Uluru & The Red Centre With The Fuji GFX50R

For a very, very long time I’ve been meaning to get out to Uluru, the red heart of Australia, for photography. Prior to this trip the closest I’d been to the Outback was Silverton, which any real Australian will tell you is not the real Outback at all.
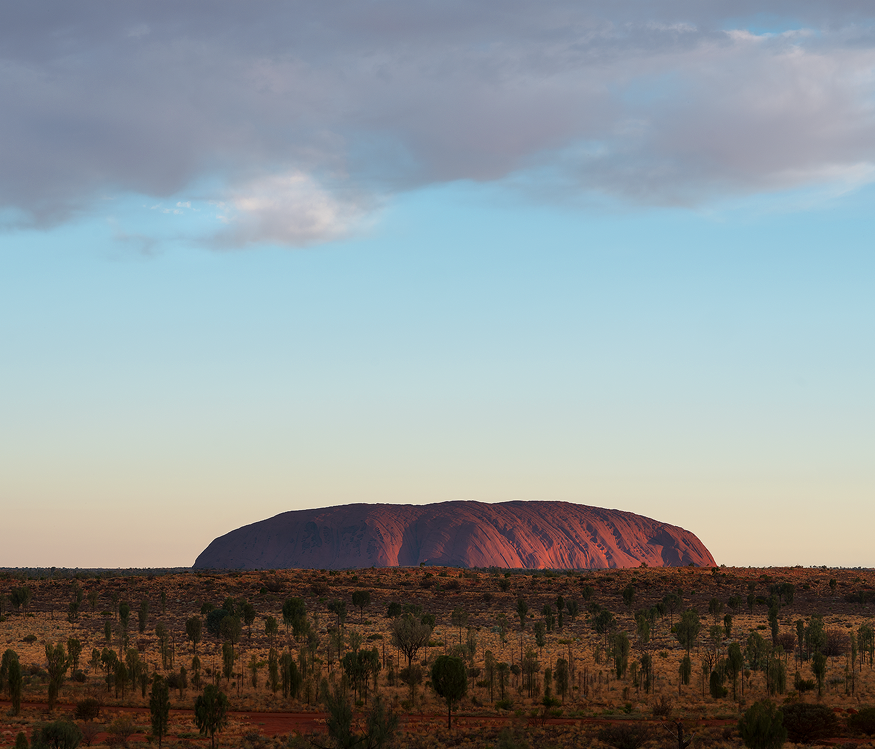
Although I generally steer towards more abstract imagery these days, I couldn’t resist this famous view. It really is a sight to watch the Rock glow at sunset. This was from Uluru Lookout not far from Yulara.

The first thing that strikes you is the rich, ochre red colour of the earth. It’s quite remarkable and alien at the same time. The two big attractions are, of course, Uluru itself, or Ayers Rock, and Kata-Tjuta. Apart from the resort town of Yulara, where we were based… that’s about it out there unless you want to venture to Kings Canyon or further afield.

Rich in iron, the soil and colours around Kata-Tjuta, here at Walpa Gorge, are incredible and completely alien.

I also spent a while walking around our resort looking for shapes and colours, anything of interest. I was really drawn to this simple scene and it has become of my personal faves from the trip.

Apart from photography, I’d booked a bunch of tours for the family, and we spent a lot of time at the free activities offered by the resort (Sails In The Desert). The kids picked up a lot of information, as did I, and we found the resort a great place to be in general, with great food and facilities.

Unable to hire a car, owing to myself not realizing how damn busy the place gets, I had to work my photography around bus tours, which actually worked out well. What I hadn’t planned on was rain and cold, which is what we got the first day at Walpa Gorge, but it actually made for very abstract photos where I could blow out the sky and concentrate on the rock formations much like I did many years ago at the Remarkables on Kangaroo Island.

Closed for a few years now, you can still clearly see evidence of the walking trail to the top of Uluru on the rockface.

Throughout the trip I was conscious of the sacred areas of the Anangu people where photography is discouraged. This includes the whole back side of Uluru and the entire Valley of the Winds walk, which I did with my eight-year-old son later in the week. That said, there is no shortage of compositions, though I found I did have to look harder than I normally would to find something unique in a place that has been photographed perhaps millions of times.

After a few days of rain and cold, it was great to see the sun come out at Uluru. These days I pay much more attention to shadow, giving it equal importance. Here, the light cuts the frame into three distinct sections.
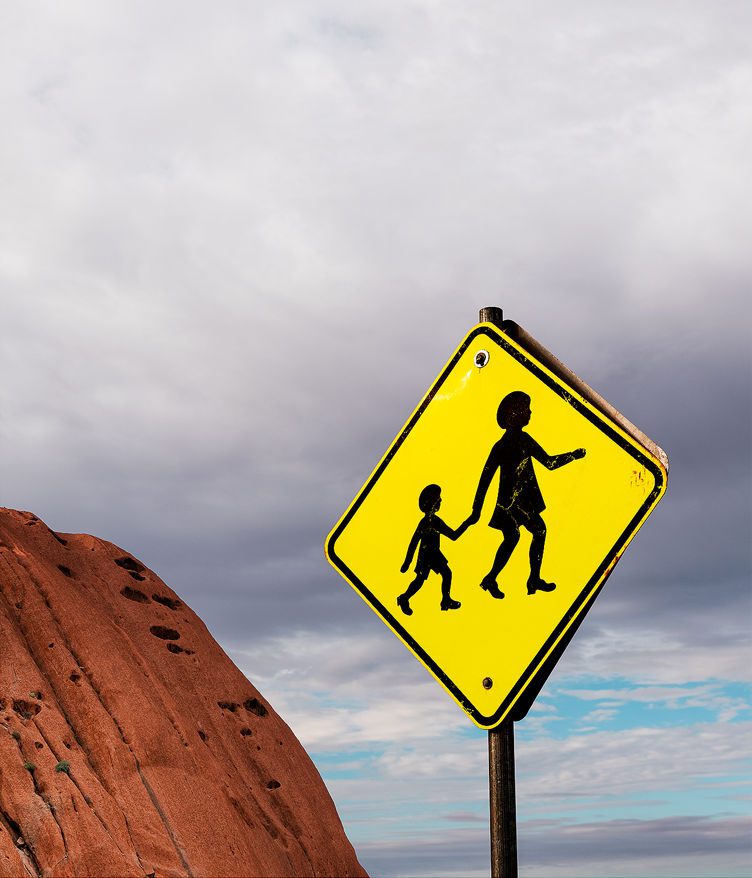
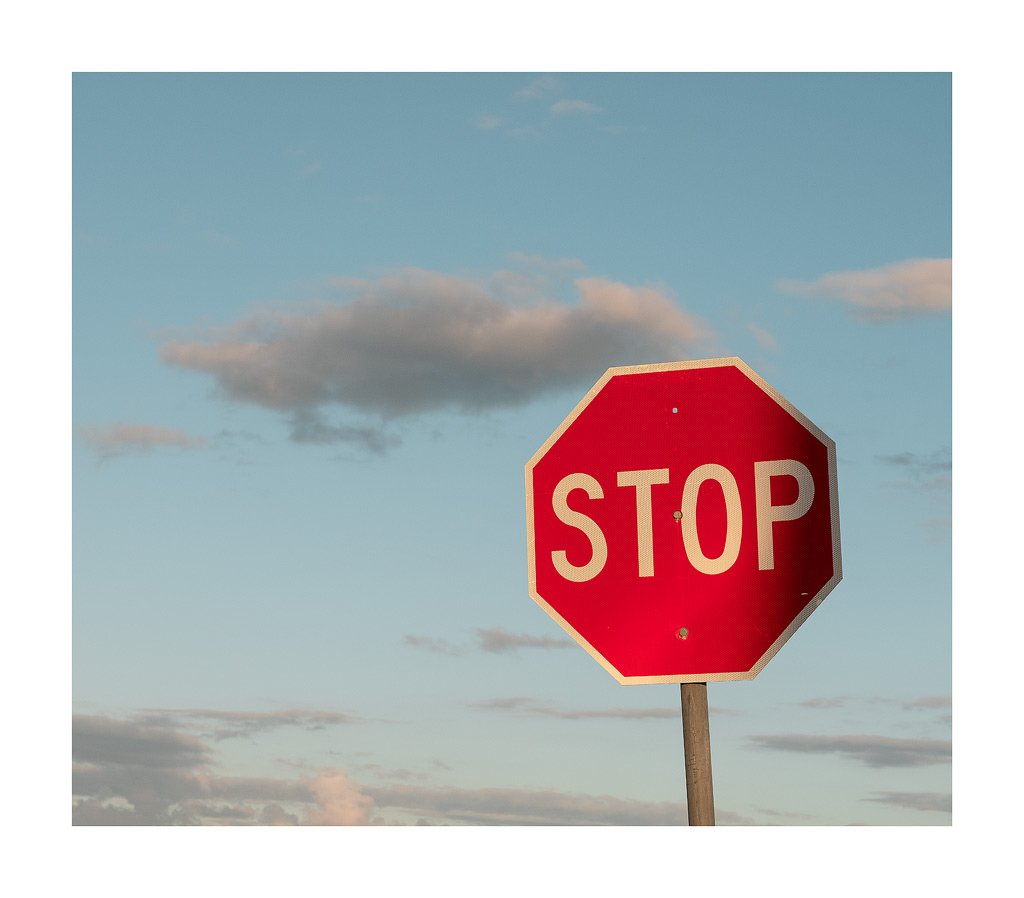
I love to find images that blend man-made with the natural world these days, whether they’re working for or against. This a very Aussie pairing.

As I do, I also spent some time wandering around the resort looking for interesting light and shapes, and these were actually among some of my favourites. I’ve also become increasingly interested in the relationship between man and nature, and Uluru is a perfect example of these two working at times both for and against one another.

Once again the GF50R made life very easy. I generally left it on Auto ISO and actually shot a wedding with the camera prior to this trip, which confirms it’s a camera that really can do it all. I only took one lens, the GF45-100mm F4, which is all I really needed, offering both a wide and slight tele when required. The files have come out rich and full of detail, most of which is sadly lost in web viewing.

I’ve been eyeing off this weathered tree in Walpa Gorge for years. It was great to finally tick this shot off my bucket list.
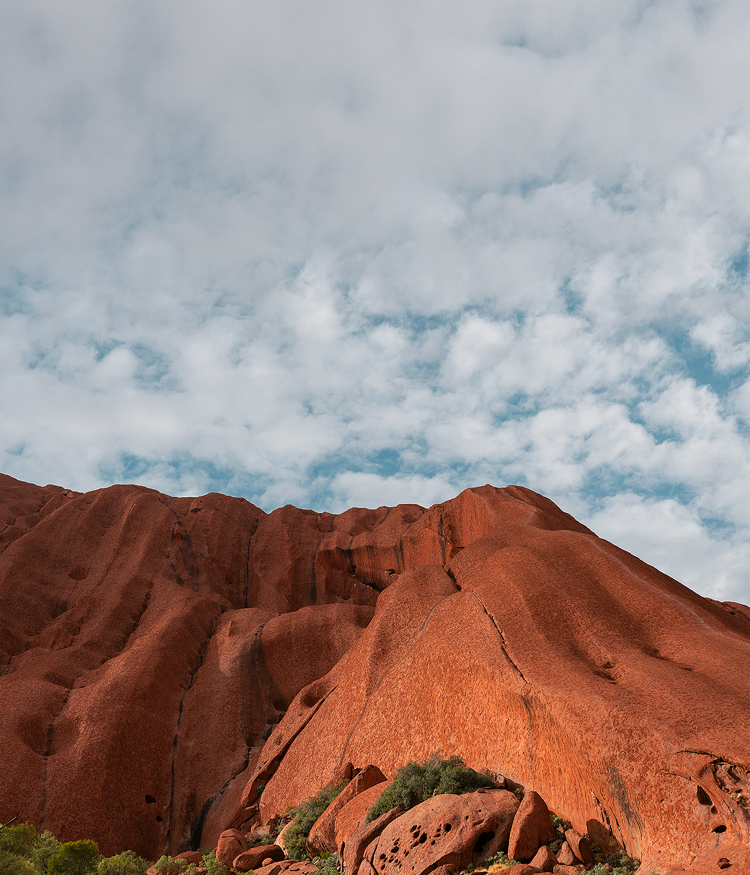
Uluru really changes depending on the time of day and lighting. Here you can see the sun is just starting to emerge.

This waterhole is a popular tourist site, but it’s also oddly meditative, as is most of Uluru.

If you are looking for something different, I highly recommend a trip out to the Northern Territory. Five days is about perfect to see everything, with flights running from most major cities daily. I was also lucky enough to do some aerial photography over Lake Amadeus while we were there. You can read all about that here.

For the full gallery of Uluru images, head here.

The sun almost setting on an Australian icon. But five minutes later…

…the sky had turned into this. It was a wonderful end to a eventful trip, even with kids.

Perfect One Day: Queensland With The Fuji GFX50R

Over the Xmas break we spent six weeks in Queensland bouncing between families we hadn’t seen in almost a year thanks to COVID and border closures. This series, ‘Perfect One Day’ is a play on the old Queensland adage of ‘Beautiful one day, perfect the next’. Indeed, Queensland typically offers up perfect, sunny weather and ideal holiday conditions, but not always. Nor is the landscape ‘perfect’. Once again I am looking for the beauty in everything, even the mundane and banal.

I am not sure what this machinery we found in the cane fields is, but I was quite obsessed with it and the afternoon light. I also like the moon above.

Thanks to the extended Sydney lockdown in 2021, I had hardly had a chance to use my camera, so I was very keen to get out and shoot as much as possible. I have found my style has changed. These days I am seeking light just as much as I am seeking subject. That includes hunting in golden hour, during the harsh light of midday and even night. I am looking for shadows and contrast, where I can underexpose images for the first time, perhaps use flash. This has come about from watching so many other photographers on YouTube during lockdown. I have felt I need to expand and grow.

This image of surfboards in front of a shop window was intended as a throwaway. I liked the light, but didn’t feel much else. However, after dropping the exposure in post and making it black and white, it became one of my favorites. More and more, I’m looking for both under- as much as over-exposure these days.

The cane fields around Jacob’s Well are a popular filming location and the source, for myself, of much visual interest. I also wanted to portray that essential coastal element so critical to Queensland life—the importance of water in both the landscape and as a part of recreation. When we reached the Sunshine Coast we were greeted with endless rain, but this too offered possibility in the greener hinterland towards Maleny. I have said it before, but adverse weather is always the best time to head out and typically the most exciting.

This Todd Hido take on a rainy landscape really worked out well. The painterly nature of the shot shows once again every shot does not have to be perfectly in focus or even sharp.

I have also found my processing has reduced a lot. This is helped along by the dynamic range and latitude in the files of the GFX50R. The tones coming from the camera also require little adjustment in post. I do run a preset in Adobe Camera RAW to give me something closer to a Kodak Portra look, which I love. It does wonderful things to the blues and reds of an image, particularly in the skies, but it is subtle. I think this way I am coming closer to getting that film experience where editing and processing isn’t taking up so much time. Even sharpening I’ve reduced by almost half.

I am loving both the latitude and tones coming from the GFX50R.

I am still yet to provide a detailed review of the Fuji GFX50R, but the more I see the results from it, the more I fall in love. In addition to the GF80 f1.7, which I use solely for portraits, I added the GF45-100 f4. It is neither cheap, nor light, but it provides the perfect range for what I shoot (about 35-80mm) and offers both IS and incredibly sharp images. The new GF35-70 was also very tempting in terms of weight, but I think overall the 45-100 was the best move. It’s all I ever need (famous last words, yes, yes).

A wonderful morning looking over the Glasshouse Mountains from Wild Horse Lookout. I find my processing for landscape images far more subdued in my old age, aiming to get the softer tones of film and even classic, traditional art instead of eye-bleeding contrast and saturation.

Adjusting to medium format has taken some time, but I’ve found the right balance now, generally shooting between f11 and f16 for depth of field, setting Auto ISO up to 3200 (a vast improvement over the Sigma) and keeping IS on unless I’m using a tripod (minimum shutter speed of 120th). Set  up like this, it really is ‘run and gun’ with little thought as to settings. The only real thing that needs any thought is whether to adjust exposure compensation.

A common question I am asked is whether the Sigma SD-H I formally used offered more detail. It’s a tough question and there is very little in it. Perhaps, yes, there is a tiny amount of micro detail the Sigma had, but Fuji has plenty of detail too. A bit of sharpening and it would be hard to tell the difference. The Sigma is a very different camera, though, and has its own look in terms of tonal separation. In terms of ease of use, the ability to ramp up ISO and the sheer dynamic range on offer, the GFX50R is a far more capable and friendly machine. Still, I hope Sigma persists and comes out with something amazing.

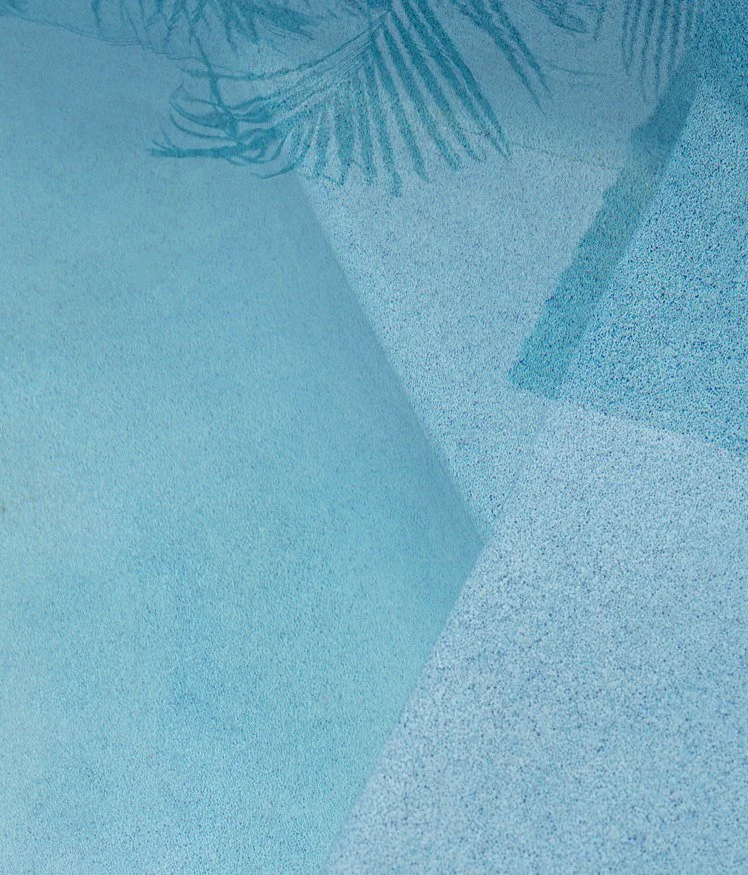
Even a simple subject like the bottom of a swimming pool can become a wealth of geometric and tonal gold if examined.

With Australia opening up a little, I have a few trips planned this year. I want to make up for lost time and really make some great images, so stay tuned. There’s plenty more to come in 2022. I’ll leave you with some shots that did not make the cut, so to speak, below. If you’d like to check out the full gallery, you can head here.

Snow In Katoomba With The Fuji GFX50R

I’ve been up to the Blue Mountains here in New South Wales countless times. My mother lived there for almost fifteen years, but I had never, until now, been there while it was snowing. When I heard a rare cold blast was due that almost guaranteed snow, I had to check it out.

Snow is a rare thing in the Blue Mountains, but this particular day it didn’t seem to want to stop.

Snow is a rare thing in the Blue Mountains, but this particular day it didn’t seem to want to stop.

As I was driving up from my home in Sydney’s west I kept an eye on outside temp. It was five degrees, then four, three… rain turned to sleet and finally snow. To say I was excited was an understatement. I arrived in Katoomba in such a frenzied state I almost didn’t know what to shoot first. Having a new camera didn’t help.

It was snowing heavily when I arrived, casting what’s usually a very familiar landscape into something foreign and magical.

It was snowing heavily when I arrived, casting what’s usually a very familiar landscape into something foreign and magical.

I have long dreamed to get a shot of the Three Sisters while it’s snowing, but such were the conditions the valley was a complete whiteout. I thought I’d wander the streets instead looking for interesting and abstract compositions of the mundane and banal, something which has become a focus of mine these last few years.

_DSF4950-copy.png

Yes, I sold all my gear, including my Sigma SD-H and Fuji X-Pro2, to buy the Fuji GFX50R, a camera I’ve been eyeing off for a while. While I am excited to see what Sigma comes up with next, I don’t see it arriving anytime soon, and the GFX50R suits all my needs. I like the idea of ‘one camera to rule them all’. I’m a minimalist at heart.

I’ll write up a more comprehensive review of the GFX50R soon, but I have found it a real joy to use. I had it out all day here and it never missed a beat. It was wet, caked in snow and still soldiered on. I shot with my sole lens at the moment, the GF 80mm f1.7, which I’ll also get around to reviewing, suffice to say it’s very, very sharp.

I love retro signs like this. Originally I did this whole set in colour, but found it was more suited to black and white in the end.

I love retro signs like this. Originally I did this whole set in colour, but found it was more suited to black and white in the end.

Having never really shot in snow, I worked out two things fast: You need a fairly high shutter speed to capture the falling snow, and two, a bit of exposure comp does wonders. Mostly I shot somewhere between 250th-500th of a second, which I found was enough to ‘freeze’ the snowflakes in most shots.

This reminds me of something out of a Wes Anderson film, more so in colour.

This reminds me of something out of a Wes Anderson film, more so in colour.

It was a fun day. I swung by Eight Things in Katoomba for some excellent nasi goreng, grabbed some specialty chocolate from the Carrington deli and checked out the exhibition at the art center. Finally, after around six hours, the snow started to abate and return to sleet. I was also very excited by the GFX50R. I’ve had a month or two with it now and look forward to showing you what it can do. Check out the full set of images below.

_DSF5058-copy.png

Taking The Long Way To The Main Range Track, Kosciusko National Park

Earlier this year myself and my friend headed the long way down to Jindabyne via Tumut to tackle the Main Range Track. The Main Range is a 21km-odd track within the Kosciusko National Park taking in everything from glacial lakes to dramatic alpine tors. It had been a while since I had travelled, or hiked, since COVID, so expectations were high.

We found this abandoned service station in Marulan, a former highway town. I love places like this which sum up the Australian roadtrip experience.

We found this abandoned service station in Marulan, a former highway town. I love places like this which sum up the Australian roadtrip experience.

We headed off the main highway through some of the smaller towns the highway has forgot, such as Marulan. As always, I’m a sucker for anything abandoned and old, retro and interesting. I was also quite fond of the mix between old and new in Goulburn. I still enjoy this type of photography, seeking out the mundane. When I’m looking for things to photograph, I don’t consider the subject at all, but instead look at things only in terms of shape, line and colour. I have found it helps if whatever I’m shooting is also in direct sunlight.

I became obsessed with signage during this trip, trying to lend a bit of space to my compositions far more than I normally would and ‘group’ elements together.

I became obsessed with signage during this trip, trying to lend a bit of space to my compositions far more than I normally would and ‘group’ elements together.

Here is another example. Once I would have taken out the power lines and additional light in the bottom right, but I think they all work together, almost like a compositional jigsaw puzzle.

Here is another example. Once I would have taken out the power lines and additional light in the bottom right, but I think they all work together, almost like a compositional jigsaw puzzle.

Once we reached Jindabyne, to be met with double rainbow over the lake, the forecast was not good for our hike the following morning—torrential rain and thunderstorms. Alas, we woke and the conditions were near perfect heading up to Charlotte’s Pass.

After a close call crossing the river, we headed up to some of the best light I’ve seen in quite a while. My friend and I had been meant to hike New Zealand’s Tongariro Crossing last year, so this hike was to essentially make up for that. I must say, the Main Range Track/Walk was far more scenic than I thought it would be, especially once you got up to Blue Lake and onwards.

The early morning light was fantastic on the Main Range, the cloud sweeping in and out of the landscape.

The early morning light was fantastic on the Main Range, the cloud sweeping in and out of the landscape.

I struggled with this image for a long time until I realised a low-key black-and-white look would suit it well.

I struggled with this image for a long time until I realised a low-key black-and-white look would suit it well.

Apparently Blue Lake is 28 metres deep and boasts the freshest water in mainland Australia due to its low salt content. We took the detour down to the water’s edge. It was certainly clear and inviting, but one finger dip into the water told me I’d come out an iceblock if I ventured in for a swim.

Blue Lake had exactly the kind of scenery I was after. The light coming from the right was perfection—It felt like nature’s own softbox. As for swimming, though…

Blue Lake had exactly the kind of scenery I was after. The light coming from the right was perfection—It felt like nature’s own softbox. As for swimming, though…

The weather changed quite dramatically the higher we got. We moved into the clouds and the views vanished along with visibility. This made for some of my favourite shots. When shooting traditional landscapes like this, I prefer adverse weather, silently cursing whenever there’s a blue sky. That’s quite the opposite from what I look for with my ‘mundane’ photos, so it’s nice to have both worlds.

This is one of my favourite images from the trip. There is a danger when you open Levels for an image like this and see how dark it is to bring up the whites, but I think it works far better remaining dark and moody. It adds mystery and is far more …

This is one of my favourite images from the trip. There is a danger when you open Levels for an image like this and see how dark it is to bring up the whites, but I think it works far better remaining dark and moody. It adds mystery and is far more faithful to the actual conditions.

We hit Mount Kosciusko mid-morning and from there the track improves. There were quite few people heading up the summit, including a few in wheelchairs and even a guy in thongs. It’s not exactly a killer climb. From Australia’s highest toilets and it’s then a looooooong fire trail back to Charlotte’s Pass. At times it seems never-ending, but we made it and headed back to Jindabyne Brewery for a well-deserved drink.

Finally, we wrapped our trip up at Bermagui on NSW’s South Coast. I had seen this spot below on a few social media feeds and had to check it out. At first we could not figure out how to get down to the rock shelf, but perseverance over the headland got it done. It ended up being far easier than we expected. It’s been a very long time since I shot a traditional seascape like this. I got a bit frustrated with the processing. It’s been a while!

This is spot is a photographer’s favourite on the NSW South Coast. As far as seascapes go, it would be hard to find better. In fact, the whole coast around Bermagui is full of dramatic rock formations like this.

This is spot is a photographer’s favourite on the NSW South Coast. As far as seascapes go, it would be hard to find better. In fact, the whole coast around Bermagui is full of dramatic rock formations like this.

Yet again I used the Sigma SD-H for this trip and the Sigma 50mm f1.4 ART for most of the shots, pulling out the 24mm f1.4  on occasion when I needed a wider angle. I was really hoping to see Sigma’s full-frame Foveon camera this year, but I do respect Sigma for holding back on a product they are not completely behind. I have been eyeing off the GFX50R again, so we’ll see if I make the jump.

If you can make it out to the Main Range Track, Kosciusko or any of the smaller towns listed, it’s well worth it. Australia needs the tourism dollar more than ever. Head here to check out the full gallery of images from the trip.

A Day At The Museum: Phone Photography At The Australian Museum

Recently we held our own family ‘Amazing Race’ in and around Sydney CBD. One of the stops was the incredible Australian Museum. It has to be said, if you have kids and you live in Sydney, you need to check it out. Fresh off a recent renovation, it is a true treasure trove of all kinds of natural history and interesting objects and artefacts. Kids love it, and it’s free. Walking around the museum, I started to see photo compositions. I thought, ‘Damn, I don’t have a camera on me!’. Alas, we modern folk always have a camera on us…

201210228_121020-copy.jpg

So, I pulled out my Samsung S20 and started shooting. As we were in a slight rush that day, I actually went back myself a week later to spend a bit more time walking around. It really is a photographic goldmine. It’s almost cheating when you go to a museum or theatre, where the lighting is already set up to be dramatic and interesting. It then becomes to the job of the photographer to look past that into light and shadow, and composition, to draw out visual interest.

20210309_114204-copy.jpg

I decided to make the series black and white to focus on that contrast between light and shadow, and to provide some consistency between the images. This is something I’m trying to work a lot into my photography at the moment—a ‘brand’ of sorts where it becomes clear that these images belong together, or these follow a theme… Just a way to help the viewer connect the dots. It’s probably the hardest thing in photography, to find your voice and signature style. Obviously, I’m still trying.

20210309_110236-copy.jpg

I had fun, the kids had fun, and it proves at the end of the day you do not require a Hassy or Phase, even a ‘real’ camera to take images. Could I blow these up to three-metre prints? Perhaps not, but smaller prints? Sure. Perhaps I will.

20210309_110950-copy.jpg

You can see the full series below. Check out the Australian Museum website here.

Mamiya RB67: The Continuing Joy Of Medium Format Film

It’s been a year or two since I posted about film photography. I usually pull the Mamiya RB67 out once a year to take new portraits of the kids and then tell myself ‘Never again!’ given how hard the actual process is. I should point out this is because of my kids, not the camera. It’s very hard in this digital age for kids to stand still and actually wait for a photo to be taken. When I do put in the effort, however, I am almost always pleased with the results.

5093-01.jpg

I have changed my process a little. I still shoot Portra 400 because I find it’s the perfect middle ground that offers lots of latitude with dynamic range and beautiful skin tones. I try not to shoot below f5.6. Anything lower and focussing becomes difficult. I know there are focussing screens and so on, but I find f5.6 provides the right amount of bokeh and depth without compromising both shutter speed and focus. I also have a checklist on my phone I run through to make sure the back is in the right orientation, the shutter lock is off, lever cocked, etc. It just helps make sure I don’t make any mistakes before hitting that shutter button and burning away a couple of bucks. I always use a tripod, even if it is inconvenient. All of this has combined to improve my keeper rate.

In this shot, you can see my focus was off just slightly because my daughter moved before I hit the shutter button. Is it a poorer photo for it? I don’t think so. I would argue only a fellow photographer would notice.

In this shot, you can see my focus was off just slightly because my daughter moved before I hit the shutter button. Is it a poorer photo for it? I don’t think so. I would argue only a fellow photographer would notice.

It might sound a bit crazy, but I no longer meter for my shots. I’ve shot with the Mamiya enough to know what shutter speed will work for what kind of light. Outside, it’s usually a choice between 1/125 or 1/250 if I’m trying to overexpose and shoot at 200 ISO. I will err on the side of overexposure rather than under with Portra. Given that, shutter speed and orientation are really the only two choices I make before lining up a composition.

5091-05.jpg

I’ve also become very conscious of light. When I first shot film I disregarded lighting conditions entirely thinking the dynamic range of Portra would cover it, but like any kind of photography, light is king. Now I actively seek out interesting light and will often put the camera way if I do not feel a shot one-hundred percent. This is slowing down and considering your shots—something many talk about when discussing film photography, a lot of which has carried over to my digital work.

5090-02.jpg

While it can be cumbersome and far more effort is required, these film photos are far more special to me than photos of the kids I’ve taken with my digital cameras. I still see that hard-to-define quality in them you simply don’t get with anything else. I’ve been looking into large format (clearly a sucker for punishment), so we shall see where that goes.

Over the years my daughter has become somewhat adept at posing. As soon as the Mamiya is out, she knows what to do, even if she preferred I hurry it up…

Over the years my daughter has become somewhat adept at posing. As soon as the Mamiya is out, she knows what to do, even if she preferred I hurry it up…

Something else that is worth mention is to consider who is scanning and processing your images. I experimented with different labs but eventually came back to Atkins even though they are a touch more expensive. Find a lab you connect with who delivers consistent colors and results.

5088-09.jpg

Have I considered another medium-format camera? Sure! But I always use the Mamiya and can’t bring myself to get anything else. I love the fact it’s all manual, doesn’t require batteries and is built to last. I know there are sexier cameras out there (looking at you, Hassy) but the Mamiya is enough for me. As they say, if it ain’t broke…

5087-03.jpg

Canola Season In Regional NSW With The Sigma SD-H

Well, who could have predicted what would become of 2020. Certainly not me. I had a big New Zealand trip planned in April, lots of photographic ideas… and then coronavirus. Everything, for everyone, changed, but like all of us I’ve tried to make the best of it. So it was I headed out with the family for a roadtrip to regional NSW right through canola country. Funnily enough, I had no idea it was canola season. It was simply a happy coincidence.

Having never seen canola before, I was amazed at how rich and vibrant the colour was. If I was travelling by myself, I probably would have been pulling over every five-hundred metres.

Having never seen canola before, I was amazed at how rich and vibrant the colour was. If I was travelling by myself, I probably would have been pulling over every five-hundred metres.

We started with an overnight stay in Bathurst. I headed out for an early morning walk with my Sigma SD-H and 50mm f1.4 ART. There is so much interest in Bathurst simply walking around the streets. I find that goes for all country towns in Australia.

I think I’ve come to a good place with the Sigma. Ninety-perfect of my shots are taken with the 50mm, though I do pull out the 24mm from time to time for a wider angle (keeping in mind the 1.3x crop factor). It turns out I’m always looking for a little more reach, however, so ideally the 85mm range is probably a better fit for me.

I was saddened to hear Sigma would not be releasing their full-frame Foveon camera this year, but I applaud the company for holding a product back instead of releasing something they weren’t willing to stand by 100%. I’m still keen to see what comes of it next year, or maybe the year after, though I have been eyeing off a Fuji GFX-50R. Stay tuned.

I had my wife pull over so I could shoot this out the car window. There were a group of people out of frame who must have thought I was completely mad, but this is my perfect kind of image these days. Read into it what you will.

I had my wife pull over so I could shoot this out the car window. There were a group of people out of frame who must have thought I was completely mad, but this is my perfect kind of image these days. Read into it what you will.

From Bathurst we travelled to Wagga Wagga through Blayney, Cowra, Cootamundra, Junee and many towns that were little more than a general store and a pub. I love driving through the streets of these towns and looking for comps. What am I looking for? Anything with visual interest, whether that be lines, form, colour… Something that stands out, or has character. Often I find things too cluttered to pull a composition from, so it can be a trying process to find subject matter that is just right. It’s also very hard to explain to people you’re looking for more than a ‘derelict building’.

A classic Bathurst street scene with the morning sun and the old sofa on the verandah. It really sums up country living for me.

A classic Bathurst street scene with the morning sun and the old sofa on the verandah. It really sums up country living for me.

I fell in love with this purple flower only to discover later it’s a fairly prominent weed known as Paterson’s Curse.

I fell in love with this purple flower only to discover later it’s a fairly prominent weed known as Paterson’s Curse.

We stayed at Belisi Farmstay near Wagga Wagga and it was perfect. If you have kids (or not), I highly recommend a visit. My kids are not terribly used to animals, but loved getting out seeing the horses and collecting eggs in the morning.

I was surprised how far the canola extends and how the colour changes according to the light. In particular, overcast or cloudy conditions actually provided the most interesting light, really spotlighting certain sections of the field and giving them shape. Like I said, I could have spent forever driving around looking up compositions.

The colour of the canola really changes depending on the weather, which did make consistency in psot-processing difficult. I think in the end I simply decided to work on an image-by-image basis and forget consistency altogether.

The colour of the canola really changes depending on the weather, which did make consistency in psot-processing difficult. I think in the end I simply decided to work on an image-by-image basis and forget consistency altogether.

I lot of people think having a small strip of landscape at the bottom of the frame set against a large sky is part of my style, but it’s more of a function of the limited reach of my 50mm lens.

I lot of people think having a small strip of landscape at the bottom of the frame set against a large sky is part of my style, but it’s more of a function of the limited reach of my 50mm lens.

There’s a lot more than canola out this way, too. We visited the Temora Aviation Museum, the rather delicious (and dangerous or the waistline) Junee choc factory, as well as what is Australia’s most haunted house, Monte Cristo. My wife and daughter were happy to wait in the car for that one.

The shadow of a door handle in morning light. I thought this tied in nicely to the surrounding canola.

The shadow of a door handle in morning light. I thought this tied in nicely to the surrounding canola.

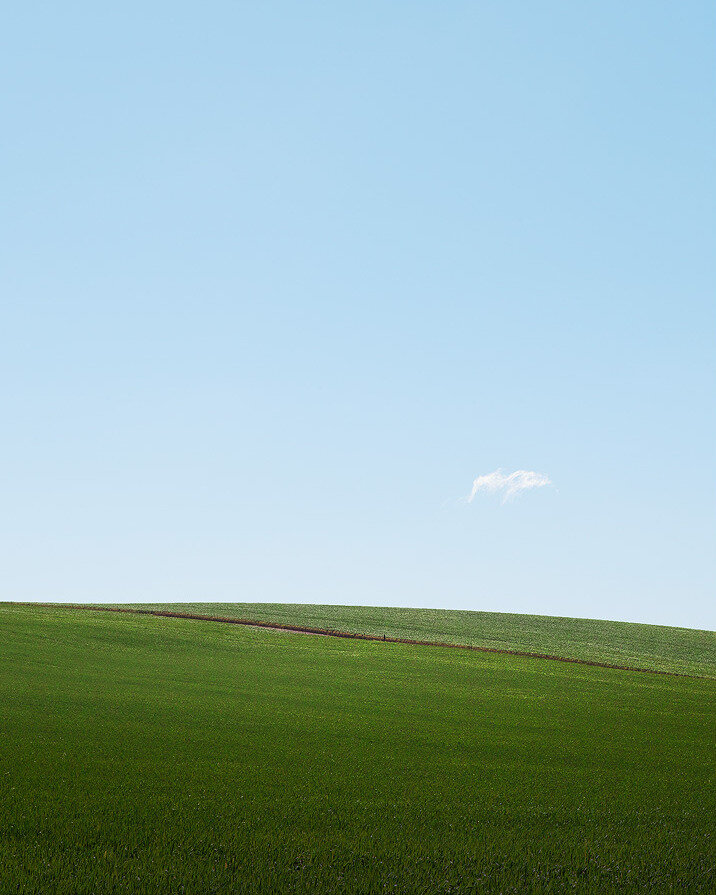
Windows wallpaper, anyone? There was no shortage of rolling hills.

Windows wallpaper, anyone? There was no shortage of rolling hills.

With most Australian states closed off to NSW for travel, it seems regional trips like this are the best way to get out and explore at the moment. It’s also a good way to show the kids holidays don’t have to be waterparks and shopping malls.

Head here for the full gallery of images.

I became somewhat obsessed with this abandoned petrol station at Wallendbeen. It had so much character and detail. I must have taken a hundred shots of it from every conceivable angle.

I became somewhat obsessed with this abandoned petrol station at Wallendbeen. It had so much character and detail. I must have taken a hundred shots of it from every conceivable angle.

I don’t think I’ve ever seen a Coca Cola sign so faded as to be almost pure white.

I don’t think I’ve ever seen a Coca Cola sign so faded as to be almost pure white.

ICM Photography Part II

It’s been a while since I updated everyone on how my ICM (Intentional Camera Movement) is coming along, so here we go. It’s slow going. I’ll take a hundred shots and not use a single one. Sometimes processing with take ten minutes, sometimes ten hours. But it is nothing if not rewarding.

I had been envisioning this image for quite a while, but it took me two or three trips to get just right. This is looking towards the Harbour Bridge in Sydney from the Circular Quay Ferry Terminal. You can see the red and white pylon marker on the l…

I had been envisioning this image for quite a while, but it took me two or three trips to get just right. This is looking towards the Harbour Bridge in Sydney from the Circular Quay Ferry Terminal. You can see the red and white pylon marker on the left, the iconic yellow and green of the ferry to the upper right. What I like most is the texture, which comes across as a mix between pencil and watercolour.

All of my ICM images to date have featured Sydney. I’ve tried not to rush it and focus on the really iconic parts of the harbour city. It really is a trial and error process, and I’ve come to learn there is actually a lot of technique to the initial capture. It is all about the movement of your wrist motion—the speed, amount of push and pull, spin… It’s not just shaking your camera around in the air, though that can also lead to a good result from time to time. Experimentation is key.

A GIF showing the build-up of this image in post-processing. It’s quite layer intensive, as you can see.

A GIF showing the build-up of this image in post-processing. It’s quite layer intensive, as you can see.

The other important element to making ICM work is to have a defined idea of not only what you want to shoot, but some idea of the composition. I find if I show up somewhere without having thought it through it leads to a scattered approach that doesn’t have a strong sense of composition, which is everything with images like this. At the least, you need a vague idea of where major focal points will be placed in the image before you ‘shoot’.

The Queen Victoria Building in Sydney. You can see the façade of the building in the back, the statue of Queen Victoria to the left and one of Sydney’s new trams moving through the bottom of the image.

The Queen Victoria Building in Sydney. You can see the façade of the building in the back, the statue of Queen Victoria to the left and one of Sydney’s new trams moving through the bottom of the image.

I feel like I’m starting to get my own feel as far as ICM images go. Something that has started to change is my use of colour. I’m pushing saturated colour far more than my original images, as you can see in the image of the QVB building above. I’m a big fan of paintings featured strong, vibrant colours, so I expect to see that filter through to my ICM photography as I start to improve and get more confident.

The famous Coca Cola sign at Kings Cross, Sydney. This one took a long time to put together over several weeks and was originally different colours completely, though I felt they made it hard to gauge the subject matter.

The famous Coca Cola sign at Kings Cross, Sydney. This one took a long time to put together over several weeks and was originally different colours completely, though I felt they made it hard to gauge the subject matter.

Things don’t always go to plan. I had this image in my head of looking up the road towards the Coca Cola sign at Kings Cross, now something of a historic monument, but when I got there I found there were too many trees and clutter obstructing the view, so I had to get much closer than planned. In the end it worked out, as above, but it was certainly frustrating at the time.

Hours and hours spent in Photoshop were required to get this particular image working. Sometimes when you’re not feeling something the best thing to do is simply walk away, which I did… several times over several weeks.

Hours and hours spent in Photoshop were required to get this particular image working. Sometimes when you’re not feeling something the best thing to do is simply walk away, which I did… several times over several weeks.

One final piece of advice, for the love of god make sure you correct for dust on the base image before duplicating it and playing around. I often get too excited and forget this basic first step. It means I end up with twenty layers in twenty different orientations and two specks of dust turning into two-hundred. Don’t be like me. Make sure you have a clean file to begin with.

I understand these images are not for everyone. They border on the truly abstract and venture far from traditional photography, but I’m enjoying myself, happy with the results and that should really be all that matters.

Regional NSW With the Sigma SD-H

Coming into the end of 2019 I realised I hadn’t had any photo trips per se. So, commitments aside, we headed off on a weekend road trip to regional NSW moving through Lithgow, Bathurst and Parkes.

This is the Bilpin Fruit Bowl, a spot I remember from many childhood mountain travels. I’d envisioned this shot for a long time but only now have got around to it. Sadly, two weeks later the fruit bowl was mostly destroyed by bushfire.

This is the Bilpin Fruit Bowl, a spot I remember from many childhood mountain travels. I’d envisioned this shot for a long time but only now have got around to it. Sadly, two weeks later the fruit bowl was mostly destroyed by bushfire.

The initial thing that struck me was just how dry it is out there in the country thanks to one of the worst droughts in Australian history. Many locals we spoke to indeed said it was the worst they had experienced. The rivers, dams and creeks were all bone dry, the land scorched and barren. This created constant dust and haze in the sky, which did make keeping the sensor clean (or not, rather, given how much the clone tool got a workout) interesting.

We pulled into our hotel at Parkes just as a dust storm engulfed the town. I ran across the road and was subsequently sand-blasted taking this shot.

We pulled into our hotel at Parkes just as a dust storm engulfed the town. I ran across the road and was subsequently sand-blasted taking this shot.

I especially like the banality of these country towns and the unique compositions they offer. We swung by the Parkes Historical Aviation Restoration Museum, which was especially photo-friendly. The texture and details in the planes was exquisite and could have kept me there for hours. Also worth a look was the State Mine Heritage Park in Lithgow, a real hidden gem I personally had never been to before.

The Chinese restaurant is a real country town staple in Australia. I have a particular fascination for them.

The Chinese restaurant is a real country town staple in Australia. I have a particular fascination for them.

I changed my processing a little for these images, using new LUTs I have created, though I can’t say I’m completely satisfied with the consistency between them all. This was made especially hard with the constantly changing sky and light conditions owing to the dust, plus ash and smoke from the NSW bushfires further afield.

The Historic Aviation Restoration Museum (HARS) in Parkes is a must-visit for photographers

The Historic Aviation Restoration Museum (HARS) in Parkes is a must-visit for photographers

As always, I was impressed with the detail picked up by the Sigma SD-H, especially in the textural abstracts I was taking. It’s almost ridiculous how much it soaks in. I did find myself jumping a lot between the 50mm 1.4 and 24mm 1.4 this time, which probably tells me I should be looking into the L-alliance 24-70mm Sigma has just released. I will also be extremely interested to see Sigma’s full-frame Foveon offering in 2020 and what advantages it provides over the SD-H. Increased dynamic range would be most welcome.

Having visited the region many times, I was surprised by how dry the drought has made it

Having visited the region many times, I was surprised by how dry the drought has made it

In 2020 I’m hoping to step up my landscape photography and get out to some new places, hopefully international. I still don’t think I have a signature style as such yet, and that’s what I’m hoping to explore, as well as constantly refining and minimalizing my compositions in the vein of excellent photographers like Bruce Percy and David Ward. Here’s to a new decade and new possibilities (and hopefully some rain for this sun-burnt land). See the full set of images by clicking here.

As we were coming home multiple bushfire fronts had sprung up, including this blaze near the Three Sisters at Katoomba. Since then the fires have spread in what has been one of the worst fire seasons on record so far. You can see one of the choppers…

As we were coming home multiple bushfire fronts had sprung up, including this blaze near the Three Sisters at Katoomba. Since then the fires have spread in what has been one of the worst fire seasons on record so far. You can see one of the choppers at work in the middle there.

A Guide To ICM Photography

I have been getting quite experimental with my photography this year and recently stumbled upon ICM, or Intentional Camera Movement photography. I fell into the work of photographer Andy Gray and was immediately blown away by the painterly feel of his images.

An ICM photo of Hornby Lighthouse in Sydney, Australia, my first attempt at the technique.

An ICM photo of Hornby Lighthouse in Sydney, Australia, my first attempt at the technique.

Thankfully, Andy has a wonderful YouTube channel where he breaks down step-by-step his entire process, from capture to post-processing. I definitely recommend checking it out to see just how much work goes into each image.

An ICM photo of the Sydney Opera House. Another ICM image of poppies from the Botanic Gardens has been used as a second exposure layered over the first.

An ICM photo of the Sydney Opera House. Another ICM image of poppies from the Botanic Gardens has been used as a second exposure layered over the first.

What’s required? Well, a camera, though megapixels don’t really matter given the abstract nature of the finished product, and also an ND filter. It seems something between a 6-stop and a 10-stop is what work’s best, allowing exposures within the 0.5-1.5sec  range during the middle of the day. If you wanted to skip the filter, I suppose you could shoot closer to sundown and sunrise where the exposures would be longer handheld. Like everything with this technique, however, there are no hard and fast rules. It is all about experimentation.

I opted for a 6-stop in 77mm to suit my Sigma 50mm f1.4 and also 24mm 1.4, a wider lens being the preferred option. At around $100 AUD, it’s not a terribly expensive way to get into ICM, plus you can use the filter for more traditional purposes.

The Sigma SD-H itself probably isn’t the best choice of camera. It buffers slowly and the RAW files are tedious to process when you get back home, requiring you to be somewhat picky when it comes to post-processing. Expect to take a lot of photos.

Another ICM image of Hornby Lighthouse. This one reminds of the famous aerial shots of Shark Bay in Western Australia

Another ICM image of Hornby Lighthouse. This one reminds of the famous aerial shots of Shark Bay in Western Australia

As for the process, if you watch Andy’s videos you’ll get an idea of the movement required. I set f11 and around 0.5sec, starting with a shaking motion and then a longer, whipping motion. I slowly worked up to longer exposures, trying to follow lines within the scene. It’s very much like painting… with a very expensive brush.

If there are people around, note this: You are going to look like an absolute idiot. One guy suggested ‘I don’t think that’s how you use a camera, mate’. I simply smiled back, not able to dial up a suitable comeback in time. I found the best results were when I really got into it, almost violent in the movement in able to create the required textural effect.

It’s also important you start with a regular composition in mind, just as you would if you were taking a traditional landscape. You need a prominent feature or point of interest the abstraction works around. So, frame up the scene as would normally and then go to town. I don’t have any castles or ruins nearby like Andy, but I do have Sydney Harbour and its many wonderful icons.

Another important point is to beware of highlights. It was an extremely bright day when I first tried this. Any small highlight source within the frame can easily ruin a shot by basically slicing it up with pure white. It’s a little hard to explain, but if you think you see specular highlights that are going to be blown out, avoid them in your movement.

This animation shows how the image at the top of this post was created using layers within Photoshop.

This animation shows how the image at the top of this post was created using layers within Photoshop.

Into post-processing and I simply looked for frames that stood out where the movement seem right and balanced, or the texture was right. From there it’s into Photoshop, stacking up the layers and running through masks and blend modes to find an initial base to work from.

Once the initial image has started to come together, it’s into Analog Efex Pro 2. Here, Andy uses a variety of tools to help further abstract and shape the image, but notably vignette, double exposure (inverting the image) and film effects. I found it also helped scrolling through the factory camera presets within Analog Pro 2 to see if anything worked, especially the ‘Motion’ cameras. Andy also uses Vivuza for spot adjustments, but I didn’t feel the need myself. As they say, there are lots of ways to skin the cat in Photoshop.

I think of post-processing in two parts: Colour and contrast, effectively leaving colour until last. I tried a curves layer first, adjusting RGB channels individually, but I couldn’t seem to make it work. Instead, I loaded up a LUT adjustment layer and simply scrolled through all the LUTs I have on file (which is quite a few) until I found something I liked and adjusted opacity from there. The Selective Color and Hue/Adjustment layers were good for fine-tuning.

Finally, I let the images sit there for days at a time, slowly tweaking until I thought they were good enough. It’s very easy to get stuck in a kind of ‘post-processing loop’ with these sorts of images, constantly adding and removing adjustment layers and masks, tweaking and tweaking and circling back on yourself. When I found myself doing this, I would turn off all layers except for the base exposure and add them back one by one adjusting as I went.

The above images show the interesting detail when seen at 100%.

Overall, I think I’m pleased with the results, though they are not what I expected at all. That’s the beauty of a style like this: You don’t know what you’re going to get. I’d love to make some prints and really study them.

I will say it was extremely frustrating at times. The images took a lot longer to process than usual largely in part because so much trial and error is required. It is rewarding, though, when you finally have something on screen that doesn’t look like a dog’s breakfast.

If you’d like to support Andy and his channel, you can do so here. Look out for more ICM work in the future.

An abstract view of Sydney Harbour created using the Intentional Camera Movement technique. Note what happened with the specular highlights on the water in the bottom right, but in this case I think it works.

An abstract view of Sydney Harbour created using the Intentional Camera Movement technique. Note what happened with the specular highlights on the water in the bottom right, but in this case I think it works.

Rattle & Hum Car Show With The Sigma SD-H

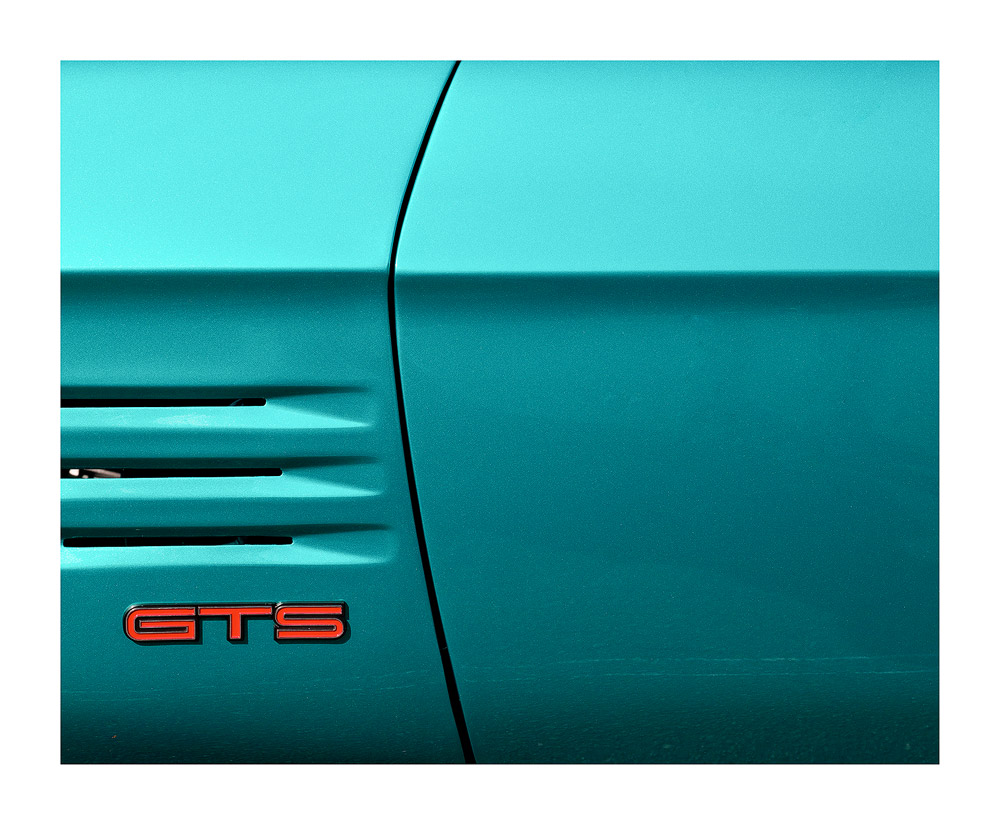
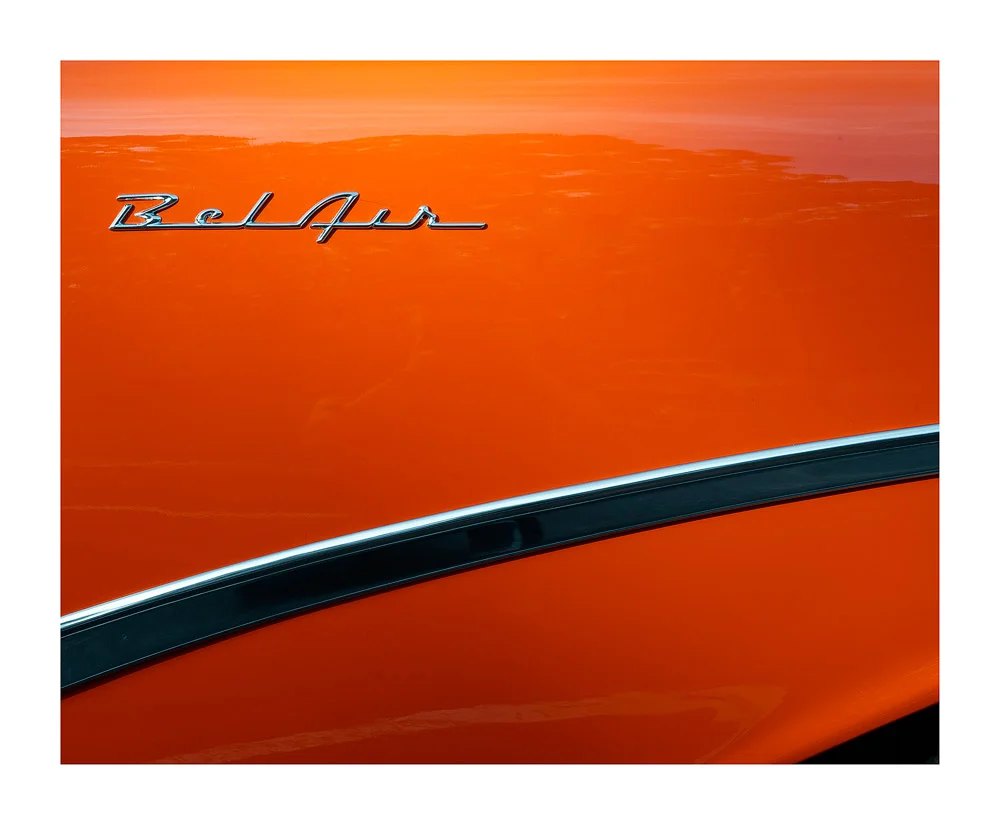
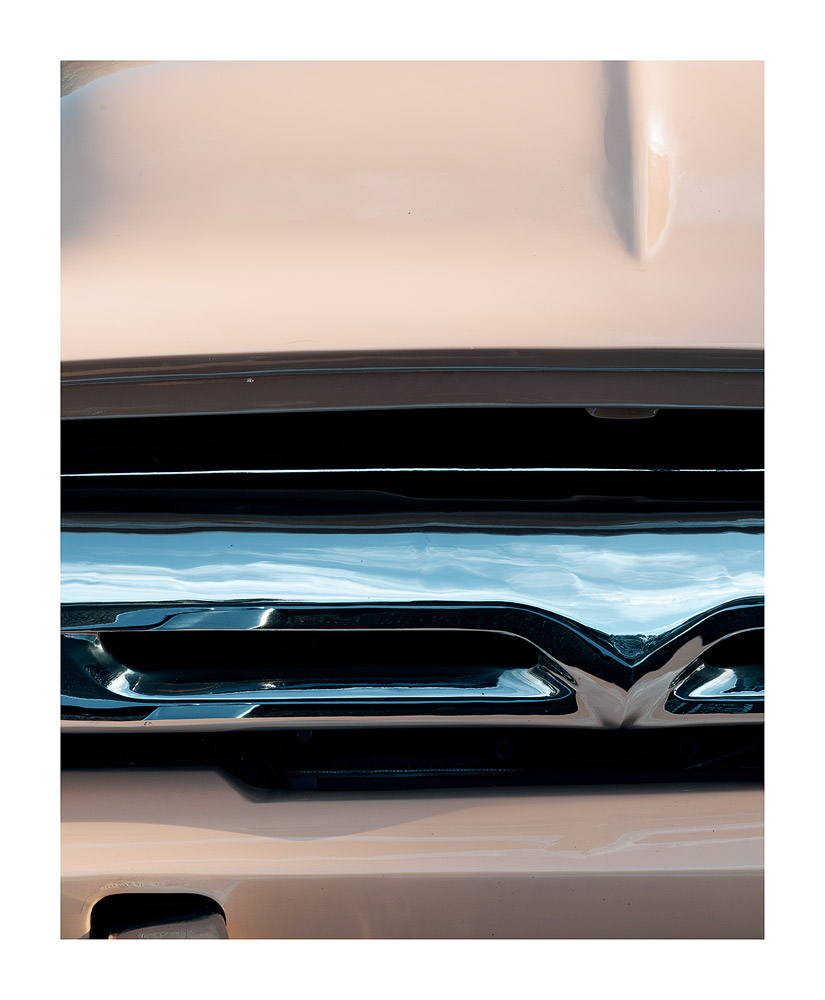
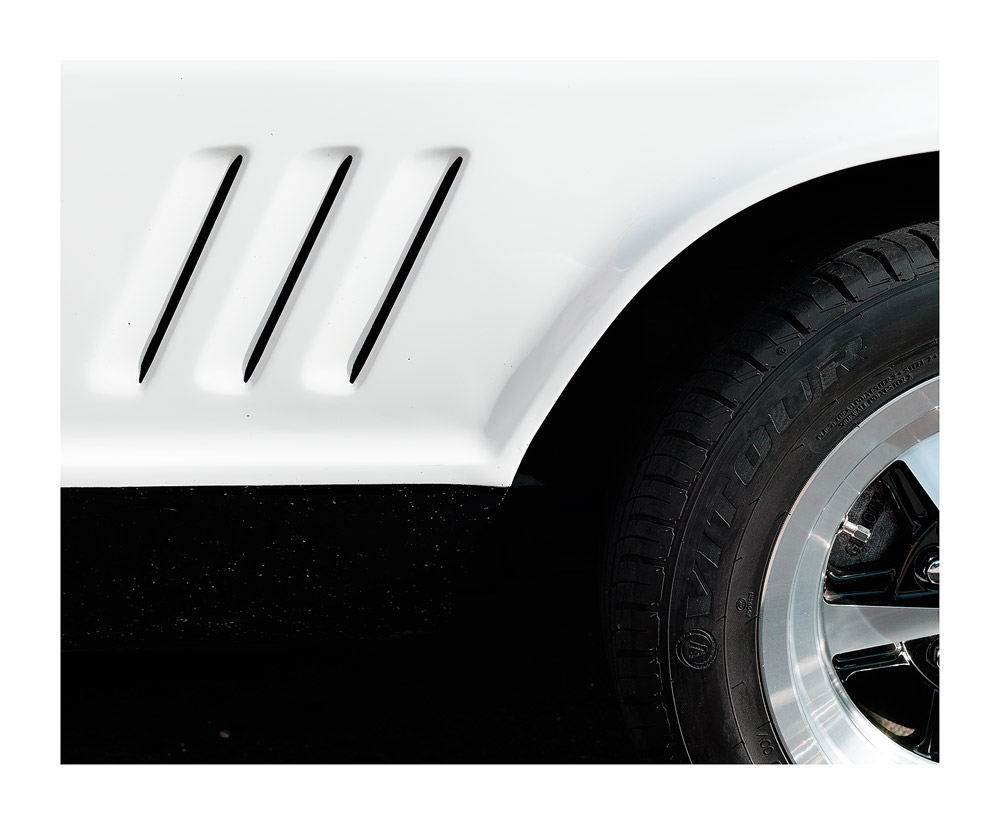
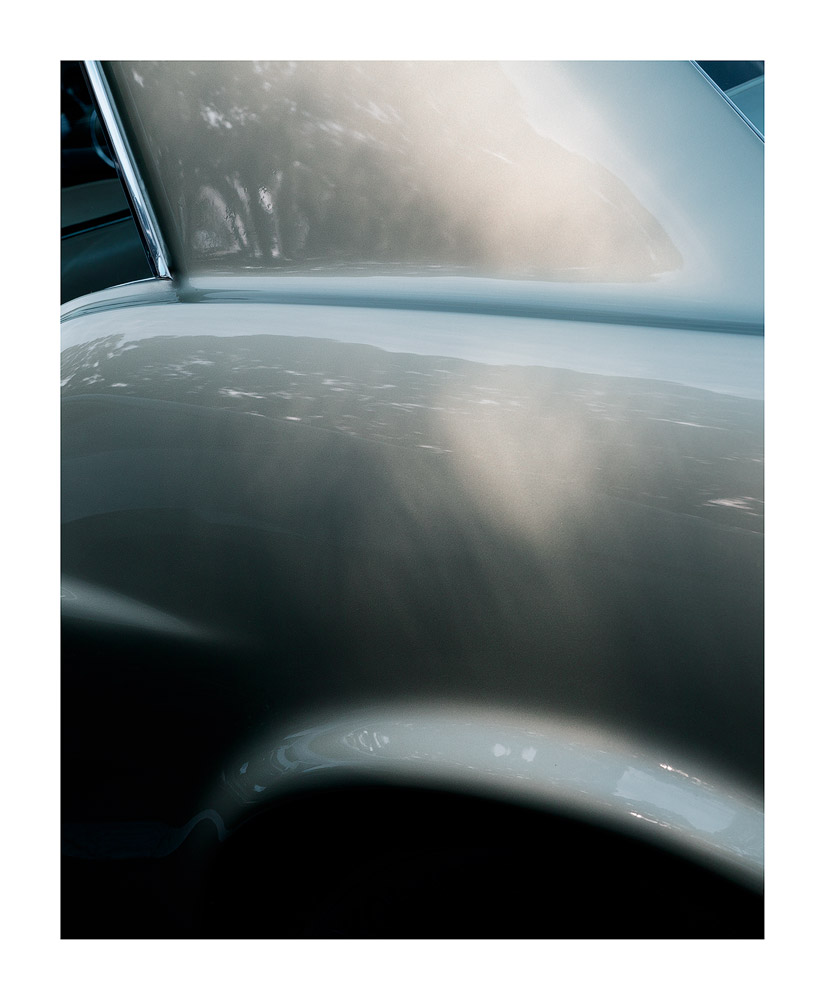
Many moons ago I was a car magazine editor. As such, you might say I have a certain appreciation for a fine automobile, plenty of which could be found at the 2019 Rattle & Hum car show at Castle Hill RSL. I decided to go along with the Sigma SD-H and 50mm 1.4 to see if I could hunt down some abstracts. The results came up nicely. Can you guess what models of car these are?

As this was an Australian vintage car show, you might not be familiar with some of these models, but there was plenty of American muscle on hand as well. I’ve found with this style high key-like photography I’m into these days that direct sun on your subject works best when it comes time to process. A subject in shadow can prove difficult to get the effect right on.

SDIM0678-copy.jpg

This is something I’ve be keen on shooting for quite a while, so I’m thinking about expanding it out to air and truck shows when I get a chance. If nothing else, it’s a great way to get the kids out exploring what everyone got around in back in the ‘olden days’.

SDIM0807-copy.jpg

Here’s the full gallery:

Tin City, Stockton Beach With The Sigma SD-H

I have many fond memories of the Stockton Beach growing up. Located about an hour-and-a-half from Sydney, access is 4WD only. It’s one of the few beaches along the coast where you can drive along the sand and, to a smaller extent these days, the dunes.

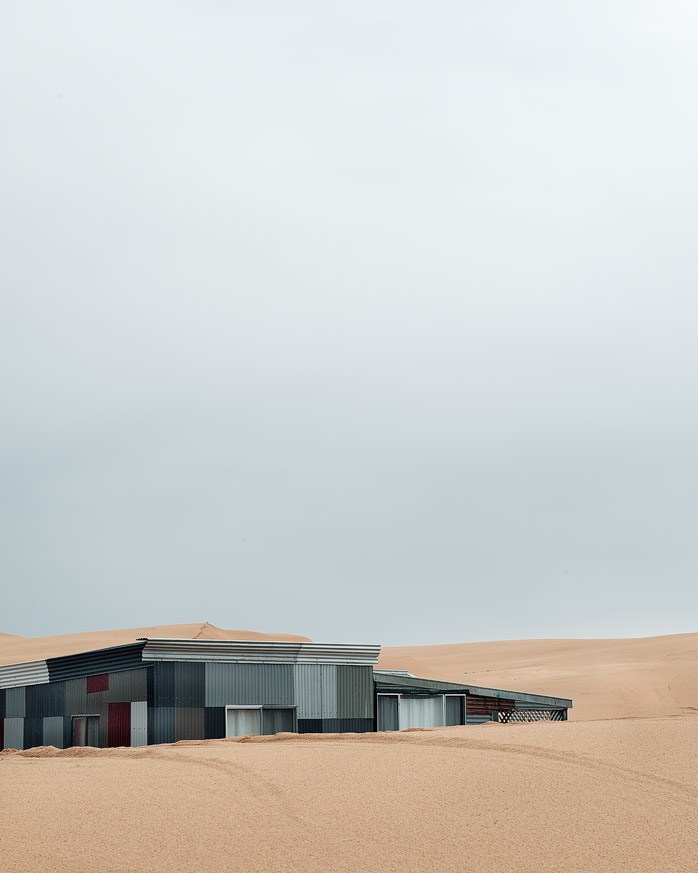
Amongst the dunes is a strange settlement of ramshackle structures known as Tin City. At first, rising from the sand, you expect to see a Stormtrooper and a droid, perhaps an Interceptor, but it’s actually the last legal squatters settlement in Australia.

The ‘city’ started in the early 1900s as tin shacks for shipwreck survivors. In the 1930s it grew out to around 36 huts, around 11 of which stand today, and yes, people were here the day I visited. As I understand it, the huts cannot be sold, but are sort of passed down from generation to generation. Since my last visit 20 years ago, many had been repaired and added upon, some looked pretty well sorted! Fishing seems to be the predominant pastime.

SDIM0530-copy.jpg

It didn’t stop raining all day, which meant we did have the beach to ourselves, but it did make photography difficult. I was initially disappointed, hoping for blue skies and strong light for the high  key style I use these days, but on reflection I like the way the rain added an ethereal mood to the images. It actually gels very well with the subject matter—lone buildings left out in the elements.

SDIM0509-copy.jpg

I also shot some of the dunes, focussing on some timber fencing that had fallen (read: been run) over. I like the minimalist feel of these images and hope to return to take more. Of course, the famous wreck was another shoot hot spot but it was, drum roll, underwater when we arrived. Next time.

SDIM0638-copy.jpg

Check out the full gallery:

Prism Fun At The Sydney Royal Easter Show (Fuji X-Pro2)

Recently I sold all my Canon gear and moved to a Fuji system (X-Pro2) for my personal photography. I still have the Sigma SD-H for my landscape projects, but the Fuji comes out whenever a family friend wants portraits or there’s a birthday party, etc. The quality of the JPEGs it produces has cut down significantly on my processing time… and I find I have less and less of the latter as the kids grow!

DSCF1063-copy.jpg

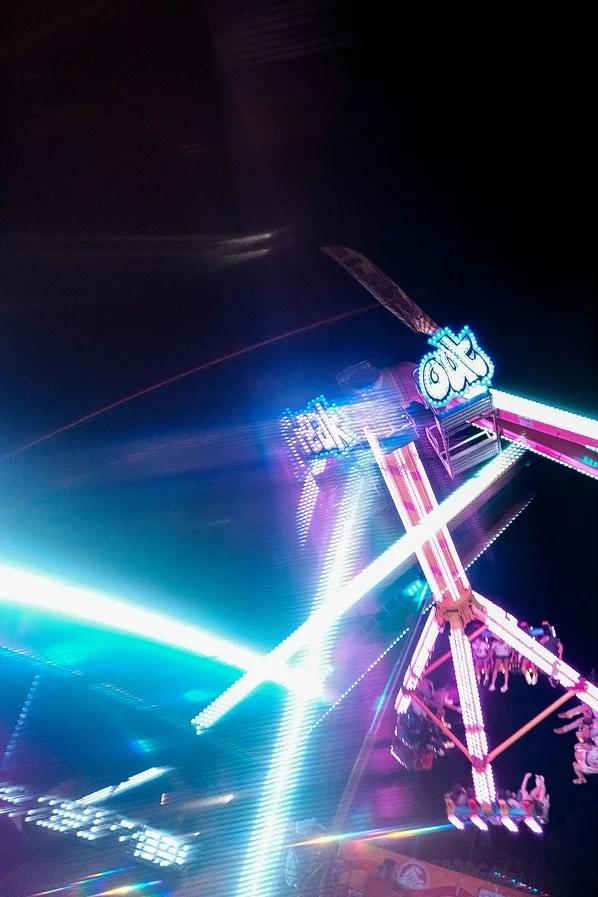
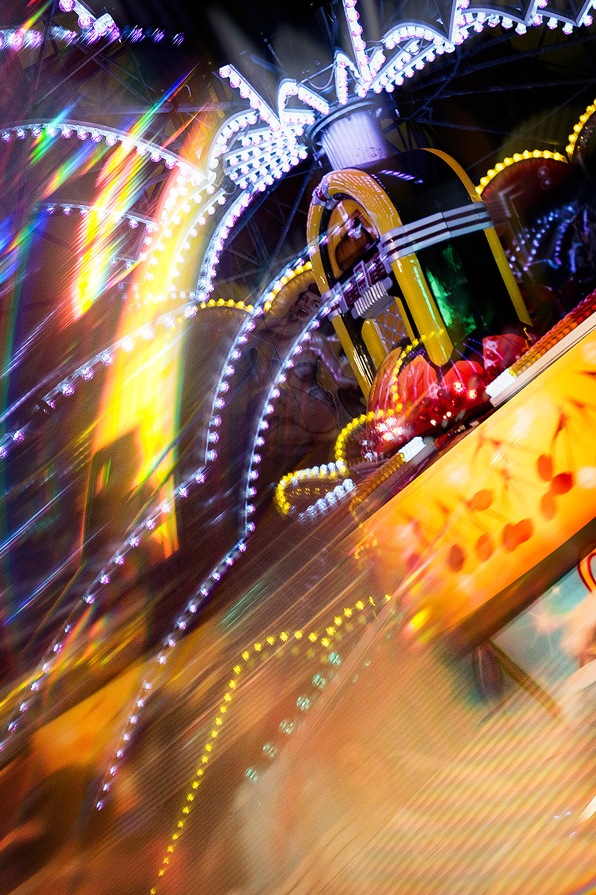
I’d already taken my Sigma to this year’s Royal Easter Show, focusing on daytime abstracts of the carnival area, which you can see here. However, the thought occurred to me I should bring the Fuji X-Pro2 and 40mm f2.8 pancake lens back at night to see if I could get some interesting high-ISO shots. As I was gearing up at home, I noticed a glass prism I had bought for playing around with portraits of the kids (see below) and decided to throw it in and see what I could come up with.

The result, as you can see, is fairly interesting. The prism lent itself perfectly to the clash of colours and lights you see at a carnival. Did it inspire some strange looks seeing me wrangling this piece of glass in front of the lens? You betcha, but I’m happy with the results, which have a nice Blade Runner-cum-Tron-cum-’80s movie poster-type feel to them. I’m thinking it may even be worth exploring a little further.

The prism was originally intended for portraits of my children. It’s really quite fun to play around with.

The prism was originally intended for portraits of my children. It’s really quite fun to play around with.

DSCF1071-copy.jpg
DSCF1048-copy.jpg

What do you think? Am I losing the plot. If it’s anything like my hair, that’s very likely. Perhaps I’ll get a couple printed up just because. In the meantime, here are the remaining images:

Finally, there was one image I took without the prism using the Sigma, just to see how far I could push it (Read: Pretty damn far NR-wise with the new Sigma Photo Pro). The image was out of focus and far from sharp, but I still love the look of it. It’s a wonderfully retro vibe to it.

New Zealand With The Sigma SD-H

I’ve decided to title this latest series Long White (all images here), not after New Zealand itself, but the cruiseliner we travelled on. I was born in Auckland, have returned many times over the years, but I found travelling this way offered a new and unique perspective. It also provided the opportunity to visit many ports and cities I otherwise would never have seen, such as Port Chalmers, Dunedin, Picton, Akaroa and so on.

Milford Sound offered mood in spades. It’s a South Island must-see.

Milford Sound offered mood in spades. It’s a South Island must-see.

Once more I aimed to look for the unique in the ordinary and seemingly banal. I’m constantly trying to refine my compositions down, to really simplify them to their most essential elements. It was an interesting journey. In fact, I found a lot of material in the ports themselves, the higher vantage point offered by our balcony provided a sort of aerial view.

There was plenty of visual interest in the ports, the cruiseliner we sailed on offering a high perspective.

There was plenty of visual interest in the ports, the cruiseliner we sailed on offering a high perspective.

Of course, a cruise is also the perfect way to see the sounds of the South Island. We travelled through Milford, Dusky and Doubtful. They are, as you would expect, extremely scenic, especially layered in mist and cloud, the sun breaking through sporadically. If you have never been to New Zealand, and especially the South Island, do make it a priority. There’s endless photographic material.

Finding a way to show the scale of Milford Sound and its towering peaks can be difficult.

Finding a way to show the scale of Milford Sound and its towering peaks can be difficult.

Many would say light is the most important element of photography, but I disagree. For me, composition trumps all else, and while great light is nice, it’s not essential to making an interesting photograph. Unfortunately, composition is one of those elements of photography that’s hard to learn, hard to teach and ultimately in the eye of the beholder. I don’t think even in the space of a lifetime you could master it.

My favourite image of the trip, taken in Dunedin. The city itself was full of art and life.

My favourite image of the trip, taken in Dunedin. The city itself was full of art and life.

In terms of equipment, I took the Sigma SD-H with the 50mm f1.4 ART and left the 24mm at home. I didn’t find I had need for a wider focal length, so I think the ‘one body, one lens’ idea will carry through from now on. I prefer it this way, getting used to the one focal length and not having to change lenses, to remove one more barrier or choice, of thinking, during a composition. The more I can minimise my gear and photography to its most essential elements, the better.

As usual, the Sigma performed extremely well. The weather sealing on the SD came in useful. For the first time I had to raise ISO during our trip through the sounds owing to the dark, wet, and windy conditions. It was a real test for both photographer and camera.

edited.jpg
A tight crop of the image above showing the impressive detail the Sigma SD-H is able to capture.

A tight crop of the image above showing the impressive detail the Sigma SD-H is able to capture.

I also find myself watching a lot of film channels, such as William Verbeeck’s, Negative Feedback and so on, and idolising many film photographers as well. I’m still tugged towards film from time to time, the tones and feel, so perhaps the next trip I will take both the Mamiya RB67 and the Sigma SD-H, to compare and try to settle this once and for all.

The colours here really say New Zealand to me, the green and black and white. I think the fact this crop means the word parlour has a sense of ambiguity about it.

The colours here really say New Zealand to me, the green and black and white. I think the fact this crop means the word parlour has a sense of ambiguity about it.

Am I happy with this series? Yes and no. With Broken there was only ever one type of weather: real damn hot and bright as can be. In New Zealand, you could have four or five different weather systems in the space of an hour, the darker and moodier of which don’t work well with the usual post-processing treatment for these images. As such, I worked on the more traditional landscapes as if they were just that.

I guess cohesion is the issue. I wanted a cohesive look to the images, but they seem to be in two camps: modern minimal and LOTR eat-your-heart-out. Still, I’m happy with many of the final compositions. This observational style of photography has really opened up a world of possibility for me, because you don’t need to chase light, so to speak, nor seek out grand landscapes. You’re simply looking for anything of visual interest.

Where to next? I have no immediate plans, but stay tuned. You never know where I’m likely to pop up.

There were plenty of compositions to be found on the ship itself.

There were plenty of compositions to be found on the ship itself.

These striped pedestrian crossing poles are unique to New Zealand (I think), but it took me a while to find a suitable background for one.

These striped pedestrian crossing poles are unique to New Zealand (I think), but it took me a while to find a suitable background for one.

SDIM0850-copy.jpg
SDIM0892-copy.jpg

Outback NSW With The Sigma SD-H

A few weeks I flew out to Broken Hill, driving back through White Cliffs and Cobar. It was clear to see the effect the drought is having on both the land and the people. It’s an extremely unforgiving environment, and I’ve tried to impart that in this series of photos I’ve titled ‘Broken’. It’s also uncompromisingly Australian, and again, I hope that cultural quirkiness shines through.

The lunar landscape that is White Cliffs, NSW.

The lunar landscape that is White Cliffs, NSW.

This also marks a new direction in my landscape photography, one more aligned with why I was drawn to the medium in the first place. It places emphasis on composition and minimalism, influenced by photographers like Christian Fletcher and artists such as Jeffrey Smart. It’s a far more observational sort of photography, turning the trip into a sort of photographic treasure hunt. There’s no more getting up at the crack of dawn or using a tripod. In fact, these kinds of photos work best in the glaring right on the midday sun. It’s almost the complete opposite of traditional landscape photography.

Old tanks at the Junction Mine in Broken Hill. The texture the SD-H picked up is incredible.

Old tanks at the Junction Mine in Broken Hill. The texture the SD-H picked up is incredible.

And I loved it. Every. Moment.

This is the first trip I’ve taken with the Sigma SD-H after my DP1 gave up the ghost. I took the Sigma 50mm f1.4 ART and also the Sigma 24mm f1.4 ART, though I only used the 24mm for a few shots. Both lenses are excellent, as is to be expected, but I did find the 50mm length (which is slightly tele on the cropped SD-H sensor) was better suited to this work and probably all I need.

I haven’t had this much enjoyment from photography in a long time. It’s definitely a move in the right direction.

I haven’t had this much enjoyment from photography in a long time. It’s definitely a move in the right direction.

The 50 1.4, as great as it is, though, is HEAVY. The biggest benefit of the DP Quattros was their small form factor. They are so light and transportable, but the 50/SD-H combo is much more in line with a DSLR. Coming from a Phase One, even the RB67, however, it felt like a feather!

Few things weather well in the Australian outback. This was a disused fuel tank.

Few things weather well in the Australian outback. This was a disused fuel tank.

I was really impressed with the SD-H. It improves on the Quattros in many important areas, notably AF, dynamic range, focus peaking, EVF etc. It’s still a niche product that won’t be useful to 90% of photographers, but for this kind of work it’s almost unbeatable at this price point. It’s not ‘medium format in your pocket’ any more, but it does provide medium format-like results at a fraction of the cost—the detail and tones are just that good.

My main focus these days is minimalism. It’s harder than you would imagine to find clean, uncluttered compositions.

My main focus these days is minimalism. It’s harder than you would imagine to find clean, uncluttered compositions.

Yes, the software still sucks, and yes, it’s slow, but it’s always worthwhile when you open up the files and see all that juicy information on offer. Scrolling around the images at 100% I was amazed how much I’d missed taking the shot in the first place-a treasure hunt within the treasure hunt, so to speak.

The side of a charity clothing bin—Not your usual subject fodder

The side of a charity clothing bin—Not your usual subject fodder

I did start to get overheating warnings with the SD-H, though it was around 38 degrees Celsius in the sun, nor did it probably help I’d left my camera back in the back of a cooking car for a few hours. I haven’t had the same issue since.

Trip-wise, I’d never been to the outback before, so this was a real eye-opener. The textures and colours on offer were wonderful. Even the most banal and mundane subjects provided unique photographic opportunity, and I’m certainly looking forward to finding more in 2019.

See the full gallery HERE.

There were some impressive murals spotted during our road trip. There’s a lot of artistic talent in the outback.

There were some impressive murals spotted during our road trip. There’s a lot of artistic talent in the outback.

This brickwork has such a distinctly Australian feel to it. It’s a common sight around the country.

This brickwork has such a distinctly Australian feel to it. It’s a common sight around the country.

Simple, as they say, is often best.

Simple, as they say, is often best.

White Cliffs offers up an alien landscape perfectly suited to this kind of photography.

White Cliffs offers up an alien landscape perfectly suited to this kind of photography.

This solar farm was once at the cutting edge of solar technology.

This solar farm was once at the cutting edge of solar technology.

Mamiya RB67: The Joy Of Medium Format Film

While my landscape work is predominantly digital, I do like to use film from time to time for a change of pace, to shoot the kids, etc. A good photographer friend of mine was kind enough to send up his father’s Mamiya RB67 medium-format film camera a few years ago with the 90mm f3.8, a couple of backs and so on. It sat around for quite a while until I finally decided to give it a crack.

Jason Round Mamiya rb67.jpg

Having never shot medium-format film before, the learning curve was steep. Even now I’ve got a good handle on it I make mistakes, which is costly when each shot is around $5 AUD considering developing, processing and scanning (I use Atkins in South Australia). However, the results you can get from medium-format film (and I’d happily assume large format if I could afford it) cannot be beat.

Jason Round Mamiya rb67 8512-02-copy.jpg

I use Porta 400 exclusively now after finding 100 too slow and the grain negligible between the two. It’s such a wonderful film that provides perfect skin tones every time and offers monstrous dynamic range. It’s almost impossible to overexpose. The creamy highlights, the tones… It’s everything film should be. I rate the film at 200 and use a basic phone app for metering even though I have a spot meter, always aiming to shoot 1/125th or higher to avoid shake and slap, especially with a mirror of this size. When the Mamiya takes a shot, you know about it!

Jason Round Mamiya rb67 8519-02-copy.jpg

It sounds straightforward, but there’s a real process you have to follow with each shot (unlock, dark slide, orientation, cock, aperture, speed, focus), which can be difficult when you’re dealing with jumpy kids keen to get on with playing or running about. The hardest part for me has been nailing focus, especially at the pointy end of f3.8, but shooting at f5.6 has helped a great deal, and simply taking my time. This is not a run-and-gun camera, folks.

8518-06-copy.jpg

I challenge anyone, photographer or otherwise, not to look down into that viewfinder and fall immediately in love. It’s such a beautiful thing, almost another world in there. I know the RZ67 is often touted as the better camera given its faster lens offerings, but I like the fact the RB is all manual, having to wind each shot and so on, plus it makes for a handy self-defence tool should anybody get in your way. I’m serious, this is the M1 Abrams of the camera world, utterly indestructible.

8516-07-copy.jpg

This series was shot over the course of a few months using 10 rolls of Porta. My keeper rate was probably 75%, which is better than it has been in the past, but it’s still an expensive way to take photos. I could learn how to develop and scan myself, true, but I simply don’t have the time. I know a lot of people enjoy that part of the process, but that’s not me.

8517-03-copy.jpg

People often ask me what the appeal of medium-format film is, especially when the difference can seem small to those unfamiliar with photography compared to digital but the cost so prohibitive. But when they look at the files, there is always the same response, because people are simply drawn to that warm sense of nostalgia they seem to evoke. The photos have ‘life’…

Jason Round Mamiya rb67 3681-06-copy.jpg

As a photographer, I put it down to the silky tonal graduations, smooth highlights, and unique separation offered by this combo of film and larger format, but to everyone else they simply look timeless, and that is really all you can ask for. If you’ve never shot film before, give it a shot. You might be surprised how much it fills the soul (and empties your wallet).

Jason Round Mamiya rb67 8512-09-copy.jpg
Jason Round Mamiya rb67 8521-06-copy.jpg
Jason Round Mamiya rb67 90s0s.jpg
8512-03-copy.jpg
Jason Round Mamiya rb67 8517-10-copy.jpg
Jason Round Mamiya rb67 8521-10-copy.jpg

Lord Howe Island: Mamiya 7 Film Photography

I’ve been wanting to visit Lord Howe Island for quite a while. Only a few hours from Sydney, it’s a true paradise. I recall reading an interview with someone who had travelled to every country in the world. Their favourite place of all? You guessed it, Lord Howe.

Lord Howe Jason Round-copy.jpg

We were lucky enough to stay at Pinetrees Lodge, voted by Tripadvisor as the number one hotel in Australia. It’s not hard to see why when you arrive, given the wonderful food and service on offer. It’s on another level. Of course, the epic surroundings help, and they’re easy to find.

Lord Howe Jason Round 3678-08-copy.jpg

I took the trip in the middle of a gear conundrum. When my Sigma DP-1 died, I finally decided to jump into a P-series Phase One system. I’ve been lusting after a Phase One for as long as I can remember, but never quite had the funds. Funnily enough, I soon as I started to use it I knew it wasn’t for me. I think I expected to point and shoot and only get magic in return. The results were great, but given the size and bulk of the system, the dual batteries, the cumbersome AF and glitches, I couldn’t do it.

Lord Howe Jason Round 3678-02-copy.jpg

Impressed by the results I was getting from the Mamiya RB67 and looking at the work of Patrick Wack, I decided to go all-in with film and purchase a Mamiya 7 with 65mm f4 lens. It wasn’t cheap, but it’d done my homework and subsequently decided ‘this is the camera that will make my work great!’.

Many people call the Mamiya 7 the best camera ever made. Using one, it’s easy to see why. They’re just naturally fun (and easy) to use. There is little clutter to get in the way of process. It really helps you get on with the job. It’s also beautifully designed and feels great in the hand. I used Porta 400 exclusively, running through about a roll a day for the half-week we were there. I was having a blast on the island using the Mamiya. It seemed like this would be ‘the one’, even if it was a bit nerve-wracking getting the film through the airport.

Lord Howe Jason Round 3680-01-copy.jpg

The results, as you can see, are fine. The 6x7 format works, the tones are wonderful and it gives a real, soft sense of the island. So, why did I sell the Mamiya when I returned home? I was excited to get the files back when I got back. I processed the whole lot in about an hour, but every time I zoomed in I was disappointed. The edges weren’t as sharp as I was expecting, the grain was more prominent… It sounds ridiculous, but I missed that clinical cleanliness of my digital files and the latitude for post-processing. The expense of processing and developing also played a factor (around $5 a shot AUD), so I made the hard decision to give the Mamiya up. I still have my RB67 to personal work, preferring its ability to focus closely over the 7 as better suited to portraits.

If you are considering a Mamiya 7, I’d go for the Mamiya 6 instead, which is more or less the same thing but with a square 6x6 format and a hell of a lot less in terms of cost. There are only a couple of lenses for the Mamiya 6, but I think this is actually an upside in many ways. Many 6 owners have the full set. Either way, there are both wonderful cameras and probably the pinnacle of rangefinders. If film is your thing, you’d be hard-pressed to find better. For me, it’s back to Sigma.

Lord Howe Jason Round.jpg

As for Lord Howe itself, I’d love to return. It’s hard to beat a BBQ by the beach, Mt Gower looking on, pristine water ahead with barely a soul around. Then again, I’m pleased it remains a hidden secret of sorts.

While I got around to most of the island’s iconic locations, including the hike up Mt Gower, I never got to the one I wanted to see most: Ball’s Pyramid. This giant sea stack alluded me all trip. I could see it out there on the horizon but could never get close enough given the conditions. There was not a boat on the island willing to go out. I even tried to charter a plane, to no avail. But as the hotel staffer told me, ‘You have to leave something to come back for, right?’. Hopefully next time I’ll get to see it up close and add it to my Icons series. Time to get saving again then, I guess…

Some more images for you:

Lord Howe Jason Round 22222.jpg
Lord Howe Jason Round 3679-02-copy.jpg
Lord Howe Jason Round 3679-05-copy.jpg
Lord Howe Jason Round 3680-09-copy.jpg
Lord Howe Jason Round 3678-07-copy.jpg
Lord Howe Jason Round 3682-03-copy.jpg
Lord Howe Jason Round 3679-08-copy.jpg
Lord Howe Jason Round 3680-02-copy.jpg
Lord Howe Jason Round 3680-03-copy.jpg

Western Australia's South West With The Sigma DP-1

In late 2017 a friend and I made the journey to south-west WA. I’ve long wanted to visit this part of the country, and it did not disappoint. After a day in Perth, we drove down to our base of Dunsborough from which to explore everything this region of Western Australia has to offer.

If you’re looking for pristine, postcard-like beaches, rugged coastlines and more, this is it. It’s a wonderful part of the world ripe for landscape photography. We visited Christian Fletcher’s gallery in Dunsborough for inspiration and I was blown away by the work on offer. It’s a must-see if you’re ever down that way (with a great café next door to fuel up).

Not the actual Sugarloaf Rock, but uniquely impressive in its own right come sunrise.

Not the actual Sugarloaf Rock, but uniquely impressive in its own right come sunrise.

If it is drama you are looking for, the South West coast of Australia does not disappoint.

If it is drama you are looking for, the South West coast of Australia does not disappoint.

We tackled the usual spots, including Sugarloaf rock, driving around the region and getting as far as Cape Leeuwin. A big ol’ python managed to find me in one of the bush toilets, which was fun, but most the wildlife was to be found in the second part of our trip to the Sterling Ranges.

The Sterling Ranges are reasonably remote. I think we saw maybe a couple of cars the whole time. There’s a single café and… that’s about it. It is a unique landscape in constantly changing weather. In a word, dramatic.

Fremantle offered so many photographic opportunities. This is actually my favourite image from the trip. It’s where I want my photography to head.

Fremantle offered so many photographic opportunities. This is actually my favourite image from the trip. It’s where I want my photography to head.

While there are many hikes you can do in the park, we stuck to the most popular—Bluff Knoll, ascending in an hour or two. Bluff Knoll has its own microclimate, so what started out as a sunny day at the beginning of our hike soon turned into a complete gale-force whitewash at the top where you could barely see in front of you. It was still a great walk, though, and highly recommended no matter the conditions.

We stayed in the very unique Dakota DC-3 plane accommodation at The Lily in the Stirling Ranges. It’s an odd sensation sleeping, and showering, in the interior of a plane, but it’s a great story to tell when you back, and the owners are fantastic.

A rainbow near Bluff Knoll in the Sterling Ranges of Western Australia

A rainbow near Bluff Knoll in the Sterling Ranges of Western Australia

There’s plenty of vineyards in the region… and plenty of great food to match. Here I was aiming for a more painterly approach

There’s plenty of vineyards in the region… and plenty of great food to match. Here I was aiming for a more painterly approach

Throughout the trip I used my Sigma DP-1. It still looks pretty amusing in that giant backpack I have, but it performed admirably, waiting until our very last day to die to finally give up on me (I couldn’t lock in a fixed aperture). I don’t imagine the sea spray and general wear and tear I’ve put it through helped, but hey, at least it was an excuse to go shopping for a new system. More on that soon.

In short, if you can get down to Western Australia’s south west, you’re in for a treat. Don’t miss it. Here are some more images from the trip.

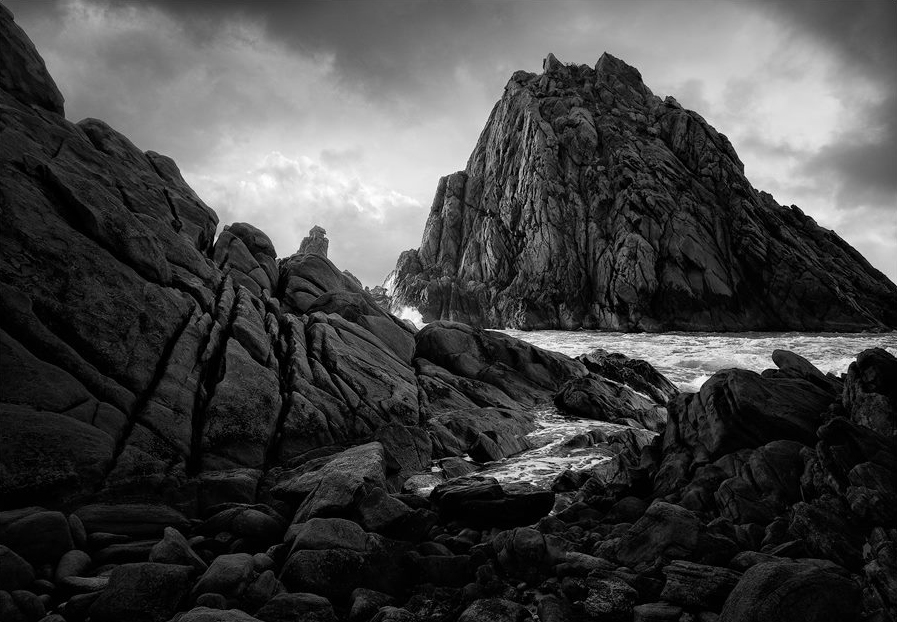
The mighty Sugarloaf Rock is such a striking formation. I thought black and white would serve it well.

The mighty Sugarloaf Rock is such a striking formation. I thought black and white would serve it well.

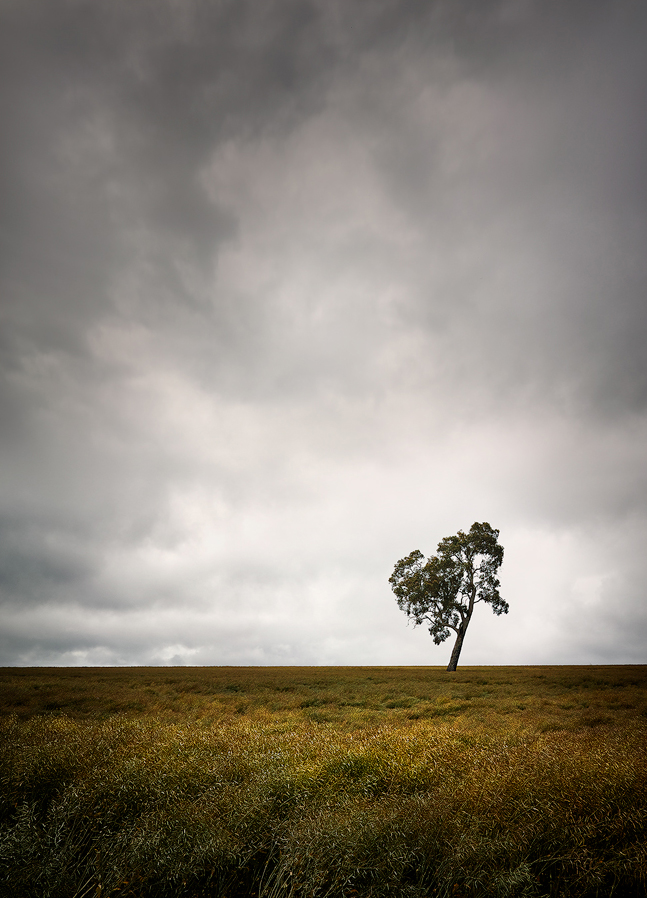
No photographer can resist a lone tree in a field.

No photographer can resist a lone tree in a field.

I could have shot in Fremantle for hours. There was just so much to take in the general public no doubt passes on by.

I could have shot in Fremantle for hours. There was just so much to take in the general public no doubt passes on by.

The famous Quindalup boat ramp.

The famous Quindalup boat ramp.

This was such an iconically Australian coastal scene I simply had to take a shot.

This was such an iconically Australian coastal scene I simply had to take a shot.

The microclimate of Bluff Knoll means you never know what you’re going to get weather-wise. It can change in an instant, and does.

The microclimate of Bluff Knoll means you never know what you’re going to get weather-wise. It can change in an instant, and does.

Boranup Forest with its towering trees is another must-see.

Boranup Forest with its towering trees is another must-see.

A few days wasn’t enough to take in all the Stirling Ranges had to offer.

A few days wasn’t enough to take in all the Stirling Ranges had to offer.

The Three Capes Track: Thoughts

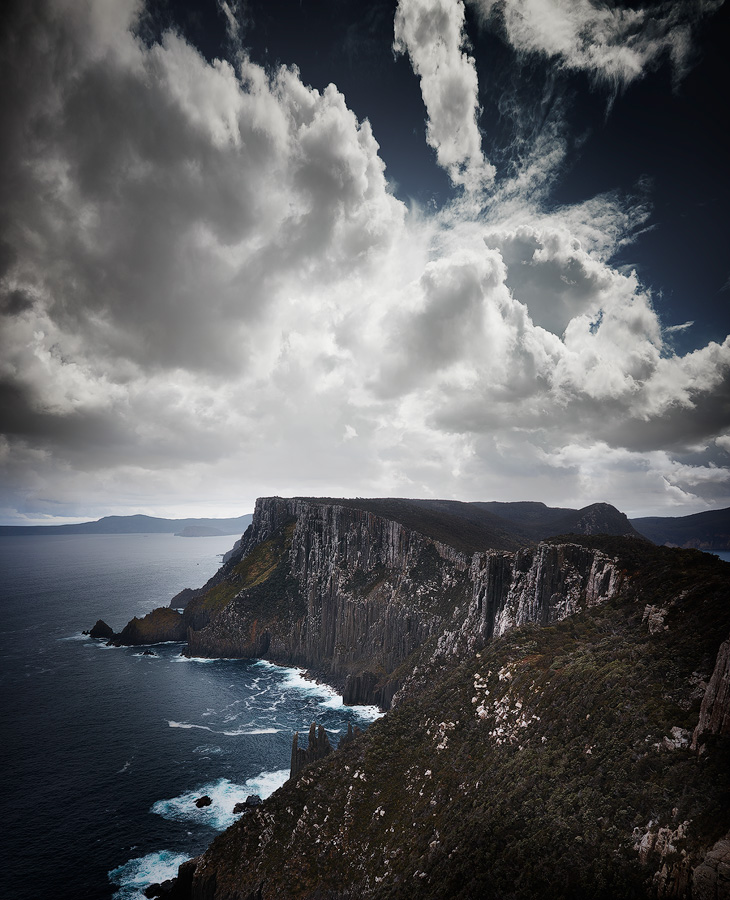
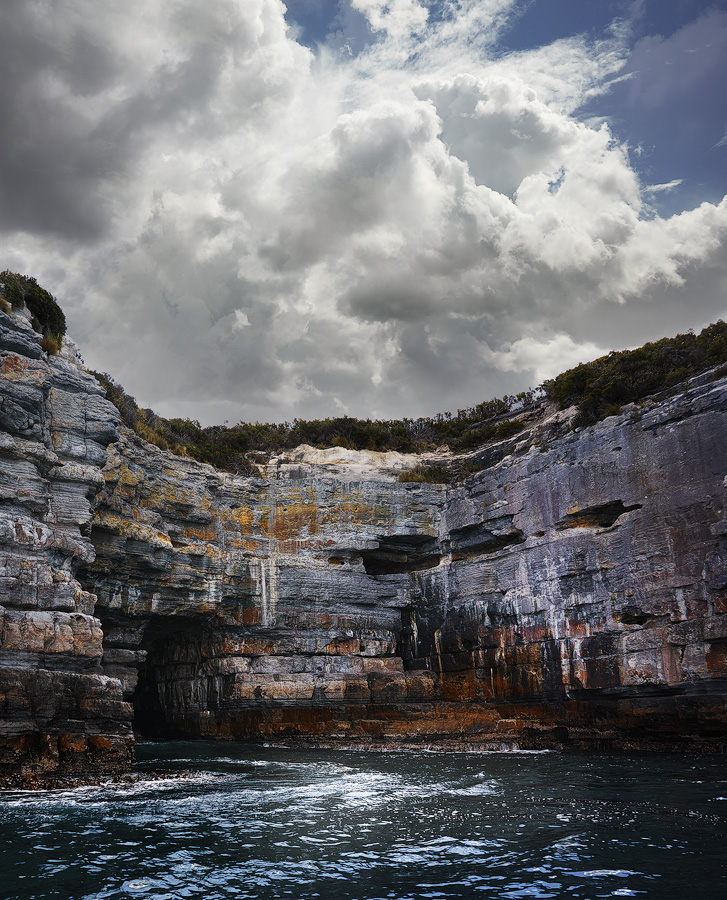
I’ve been meaning to do the Three Capes Track in Tasmania for a while now. TL;DR, it did not disappoint. From the memory-foam mattresses, to the USB phone chargers and excellent track work, you can tell a lot of thought and planning has gone into the track overall to make it as enjoyable as possible. But the real standout is the scenery—cliff lines towering hundreds of feet, dolerite galore and shimmering turquoise waters. It surely has to be one of the most scenic walks we have to offer.

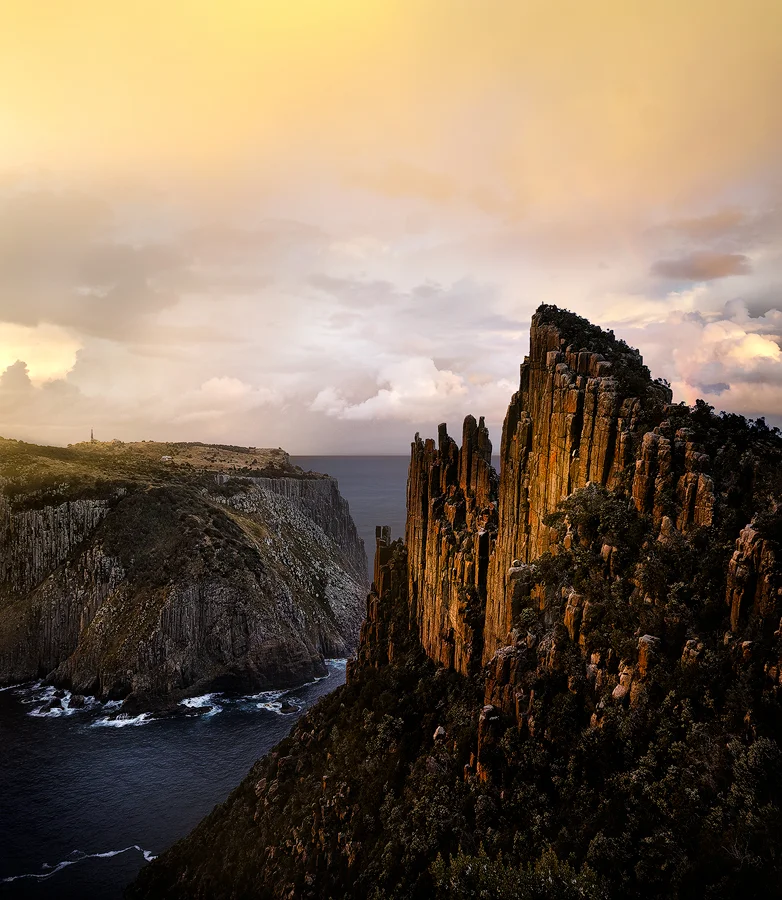
The Blade overlooking Tasman Island. You can see my friend Rob at the very top.

The Blade overlooking Tasman Island. You can see my friend Rob at the very top.

The track runs a span of 46km over four days, with three nights of (luxurious by hiking standards) accommodation. The walk is far from taxing. In fact, I’d hazard most of our group firmly fell into the later end of life. It’s designed in such a way you can really take your own pace, as fast or slow as you want, and I’d err on the latter if you’re looking for maximum enjoyment.

The price of admission includes entry to the Port Arthur Historic site and a boat ride to the start of the track courtesy of the excellent Pennicott Wilderness Journeys. There is talk of expanding the track to include Cape Raoul, but as its own I think it’s just about right.

The view from the helipad at one of the huts as a storm cleared.

The view from the helipad at one of the huts as a storm cleared.

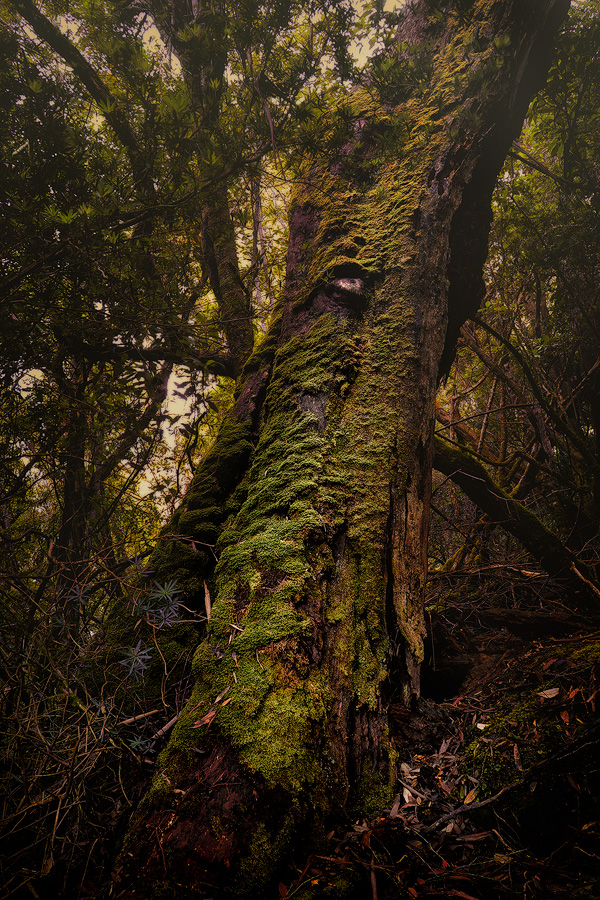
There’s also a great deal in terms of environs. The last day in particular sees you moving through a mossy beech forest that could well be the South Island. There is almost always something to see, including a variety of keenly placed sculptures and art installations with apt names like ‘My Blood Runs Cold’.

Photography-wise, it can be a bit of a challenge. I took just one camera, the Sigma DP1, but it would have been nice to have a lens in the tele range, especially shooting from some of the huts where the capes are a bit further out.

Part of the magical beech forest heading up Mt Fortescue.

Part of the magical beech forest heading up Mt Fortescue.

The highlight was, of course, the Blade, a sharp, towering formation overlooking Tasman Island and the infinite beyond. This required a very early start the night before and a climb up in the dark and rain, but the view was well worth the effort and a must if you’re looking to capture the Blade in its best light. For astrophotography, it would be great, though the Sigma isn’t much good above ISO 100.

Having done a bit of rock climbing in the past, I was especially excited to see two young men tackle the Totem Pole at Cape Hauy while we were there, a rarity given only 20-30 climbers take it on a year. It required the lead climber to abseil right down to the water and then bridge the gap by penduluming off the main face and lunging for an anchor point, all while the swell tossed and turned only feet below. Talk about a heart-racing climb!

My favourite image from the trip showing  a sudden storm moving out into the ocean. Sights like these are a regular occurance.

My favourite image from the trip showing  a sudden storm moving out into the ocean. Sights like these are a regular occurance.

As for track tips, pack as much fresh food as you can, at least for the first day or two before everyone inevitably pulls out their Back Country dehy meals (never again). The kitchen facilities are excellent. I even managed to smuggle in a half-dozen fresh eggs. People were cooking up steak and vegetables, dhal, hand-made pasta… You name it.

I’d also suggest packing as light as you can, keeping in mind you can leave unwanted bulk at the Port Arthur Historic Site (at the visitor’s centre at the top, not down near the jetty). It’s a very short walk on day one, so you’re better off taking the later boat and exploring the port. The same goes for the last, and most strenuous, day to Capue Hauy and the postcard-like Fortescue Bay. The last thing you want to be doing is rushing to catch your bus.

A similar view prior to the rain and storm activity.

A similar view prior to the rain and storm activity.

Pack for all weather. We had everything—hail, rain, sun, storms. As it’s Tassie, the UV is a lot stronger as well, so be sure to bring ample sunscreen and a hat/long-sleeved clothing. While you’re at it, allow a day or two of R&R in Hobart. Visit MONA, eat at the Machine Laundry Cafe and take it all in. It’s a surprisingly happening part of the world.

More information HERE.

Tasman Island as seen from the very top of the Blade. I have to admit, it's a rather daunting position with the wind and exposure, but what a view!

Tasman Island as seen from the very top of the Blade. I have to admit, it's a rather daunting position with the wind and exposure, but what a view!

The track includes a boat tour. Here we have what our captain referred to as the 'nostril cave'.

Landscape Photography In The Warrumbungles: A Year With The Sigma DP1 Quattro

I recently spent a weekend in the Warrumbungle region, which apart from having the greatest name ever for a national park, is also ripe with photographic opportunity. We stayed at Coonabarabran, roughly a half hour from the Warrumbungle National Park. Coona itself is five hours from Sydney, so not too bad in the scheme of things. This trip also marked my Sigma DP1’s first birthday, but we’ll get to that later.

The big draw is the Grand High Tops circuit, a roughly four-hour loop that takes in all the famous peaks the park has to offer. The rock formations themselves are remnants of an eroded volcano active 13-17 million years ago. The volcano itself was estimated to be 1km high and 50km wide, so rather large. Standing up there, you can certainly picture it.

The Grand High Tops walk is impeccably maintained. There’s a paved track for a fair heft of the way, new staircases and plenty of rest areas. It’s far from the bush track it used to be. Even the camping facilities down the bottom are first rate. Just make sure you remember where you parked your car…

About 15min into the walk I realised I was going to get some serious blisters trying to break a new pair of boots in, but I pushed on. Suffice to say, make sure you’re prepared with not only proper footwear, but water, food and warm clothing, as it gets quite cold after sunset.

I didn’t realise that the region is dubbed the ‘astronomy capital of Australia’, but at night it soon became clear why. I have never seen so many stars so vibrant in the sky. The Sigma, with its lack of high ISO prowess, doesn’t do astrophotography, but if you have a camera that does, you’re in for a treat.

The main attraction in the Warrumbungles is the famous Breadknife, a thin (surprisingly thin) blade of rock that juts from the earth like something out of Jurassic Park. Rock-climbing is prohibited, but if you’re a crag fiend, fear not. There are plenty of other peaks to scale.

We headed up for sunset the first day where I shot the Breadknife from the top lookout, leaving Coonabarabran the following morning at 2:30am to catch sunrise back at the Knife at 5:30am. A word to the wise, camp at Balor Hut and save yourself the hiking.

Sunrise gifts you with golden light smacking the side of the Breadknife, but you have to be careful, as during certain times of the year the sun is blocked by Belogery spire to the right. I wasn’t aware of this, the sun only making it through by metres, enough to light half of the rock during the best light directly after sunrise. I don’t mind the look, however, as it provides shape to the dome in the background.

At the top lookout you can turn in any direction and find a mighty peak. Here’s Crater Bluff, an imposing peak that looks ripe for climbing. It was lit with the most magical light during sunset, but I wanted a comp a little out of norm. The result is actually my favourite image from the trip.

While the Grand High Tops is great, there are so many other peaks around the area that seemingly go missed, such as Timor Rock right next to the road. One morning we waited for sunrise and drove madly shooting all the peaks we could in the good light. Although the bushfires a few years ago were terrible, what they have done is remove the vegetation from many of these peaks, giving them an alien, spiny look. The lack of trees really allowed you to see the shapes and structures of the peaks unhindered. The new growth coming through is also photogenic in its own right.

Often I find the journey to a destination is just as interesting as the destination itself. The ‘Golden Highway’ is alive with expanse fields and rolling hills, but I was particularly drawn to abandoned structures, such as the motel and train station below in Dunedoo. I took these images handheld and they are perhaps the least processed of any of the shots I took during the trip.

A perfect stop on the way back to Sydney is Lake Windamere with its haunting trees. I could resist a quick long exposure (read: 30sec).

So, what are my thoughts on the Sigma DP1 Quattro after a year then? It truly has been a game-changer for me, putting me much closer to the kind of images I want to take. The detail and dimensionality continue to blow me away, but it is not without its faults. My biggest gripe is dynamic range, especially when the Sony sensors offer so much. I’m hopeful the new SD-H might address this, and a few other issues, such as a viewfinder and exposures longer than 30sec. It will be interesting to see how it compares.

Perhaps the greatest part of travelling with the DP1 has been its portability. It really is a pocket camera, taking up barely any room in my bag but delivering files that rival medium-format. Given its lack of high ISO usability, average screen and so on, it’s very much what I imagine using an older Phase One P25 would be like. I’d love to do a side-by-side some time.

People still look perplexed when I pull the DP1. Sitting next to a Mamiya RB67 on my shelf here it looks very, very small indeed. Honestly, I don’t think fellow photographers take it very seriously at all. Their loss, I say.

As for the Warrumbungles, get there ASAP if you can. The walks are super-accessible and I dare say the view from the top of the Grand High Tops is one of the best in the whole country. It’s ancient, mysterious and complete cat-nip for photographers. Go and see why.